Hello friends! As an experienced WordPress developer, beginners often ask me how to use the WordPress dashboard to manage their websites. The dashboard can seem intimidating at first, but once you get the hang of it, you’ll find that WordPress offers a compelling and flexible way to manage your site’s design and content.
In this comprehensive tutorial, I’ll guide you through the various sections of the WordPress dashboard so you can learn how to create and edit content, choose WordPress themes, manage media, moderate comments, install plugins, and much more! By the end, you’ll be confident to use WordPress like a pro.
Introduction to the WordPress Dashboard
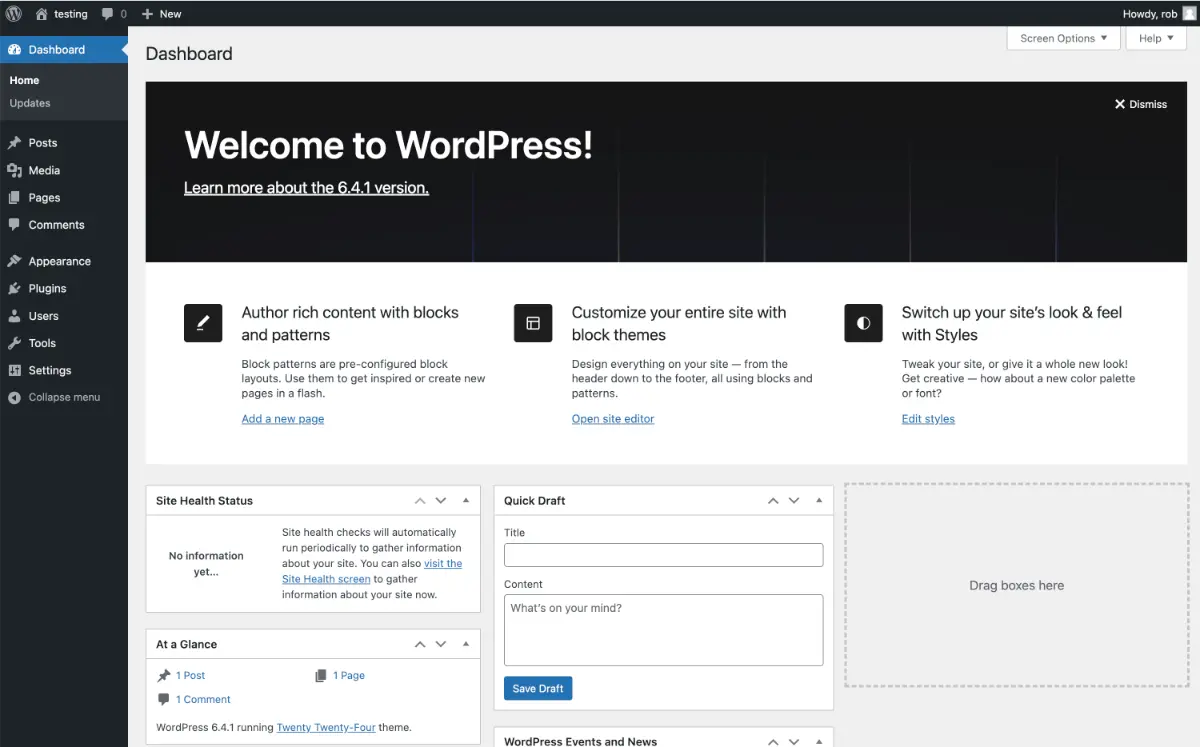
You’ll see the main dashboard when you first log in to your WordPress site. This is your central command station, where you can control almost everything on your site.
The dashboard UI is composed of the following key elements:
- Left sidebar menu: Provides quick navigation to all areas of your site, like posts, pages, appearance, plugins, etc.
- Dashboard widgets: Mini apps providing at-a-glance information.
- Toolbar at the top: Provides one-click access to standard functions.
You can customise what sections, menus and widgets appear on your dashboard for quick access to the items you use the most. I’ll get into customisation options later in this article.

Creating Your First WordPress Post
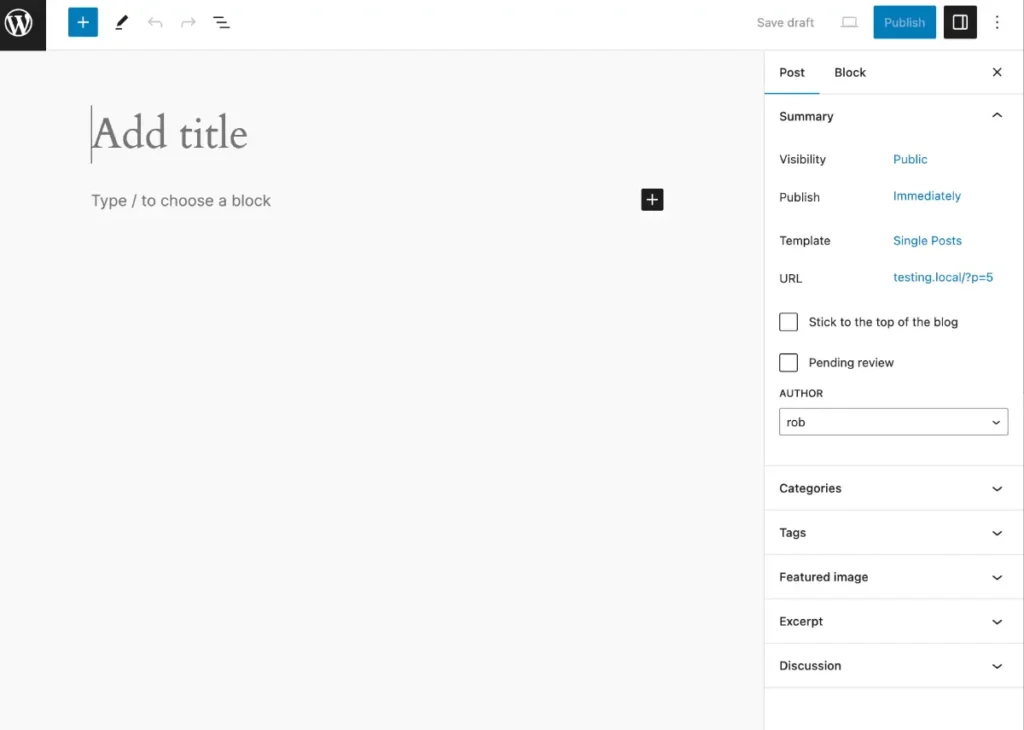
Ready to dive in and create your first WordPress post? Here’s a quick step-by-step guide:
- Click on Posts » Add New in the left sidebar.
- Enter a title at the very top for your post.
- Write the content for your post in the main text editor section. You can format text, add links, insert media and more.
- On the right sidebar, select an appropriate category or create a new one.
- Once done, click Publish to make your post live!
It’s that simple. Now, look at some key concepts for managing your posts and pages.
Posts vs Pages
It’s essential to understand the difference between posts and pages in WordPress:
- Posts are blog entries displayed in reverse chronological order on your blog page. They are usually short-form content.
- Pages have no chronological order and are used for static content like your About page, Contact page, etc.
You can create and manage posts and pages from the respective sections in the WordPress sidebar menu. The process of making them is very similar to what you learned above.
Categories and Tags
Categories and tags help organise your content and make it more discoverable:
- Categories group related posts under a common topic. For example, “Recipes” or “Product Reviews”.
- Tags are more granular labels that describe specific details of a post, such as ingredients or custom taxonomies. For example, “chicken”, “dinner recipes”, or “WordPress tips”.
When writing posts, get in the habit of assigning one or more relevant categories and tags. Over time, these make it easier for readers to find the content they are interested in.

Enhancing Posts with Media
You can enhance your blog posts by inserting media like images, galleries, audio, video and documents. To add them:
- While editing your post, click the Add Media button.
- Upload files from your computer or choose existing ones from your media library.
- Once uploaded, insert them into your post at the desired location.
The media you upload is also available for reuse in other posts. Your media library is a centralised repository, allowing you to manage all your files easily.
Managing Your Media Library
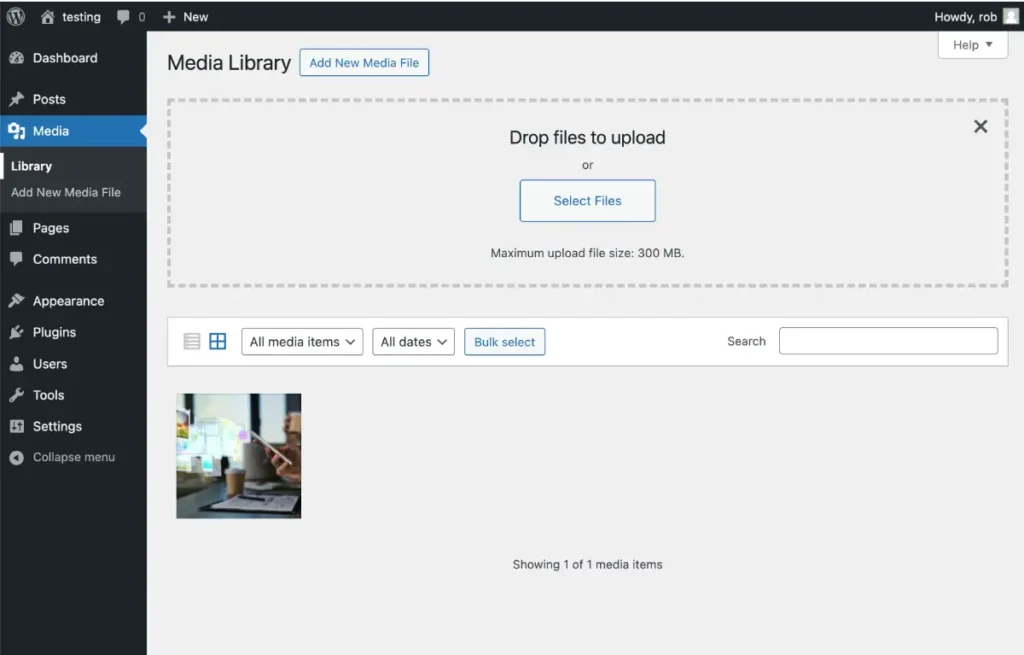
Speaking of the media library, let’s discuss how you can organise and arrange your files. The WordPress media library stores all files you upload to your site, such as images, videos, audio files, and documents.
To access it, click on Media » Library in the sidebar.
From here, you can:
- View, search and filter your uploaded media
- Edit item titles, captions or descriptions
- Organise files into folders
- Permanently delete unused items
Taking a little time to structure your library will save you tons of time when publishing content down the road!
Customising Your Website with WordPress Themes
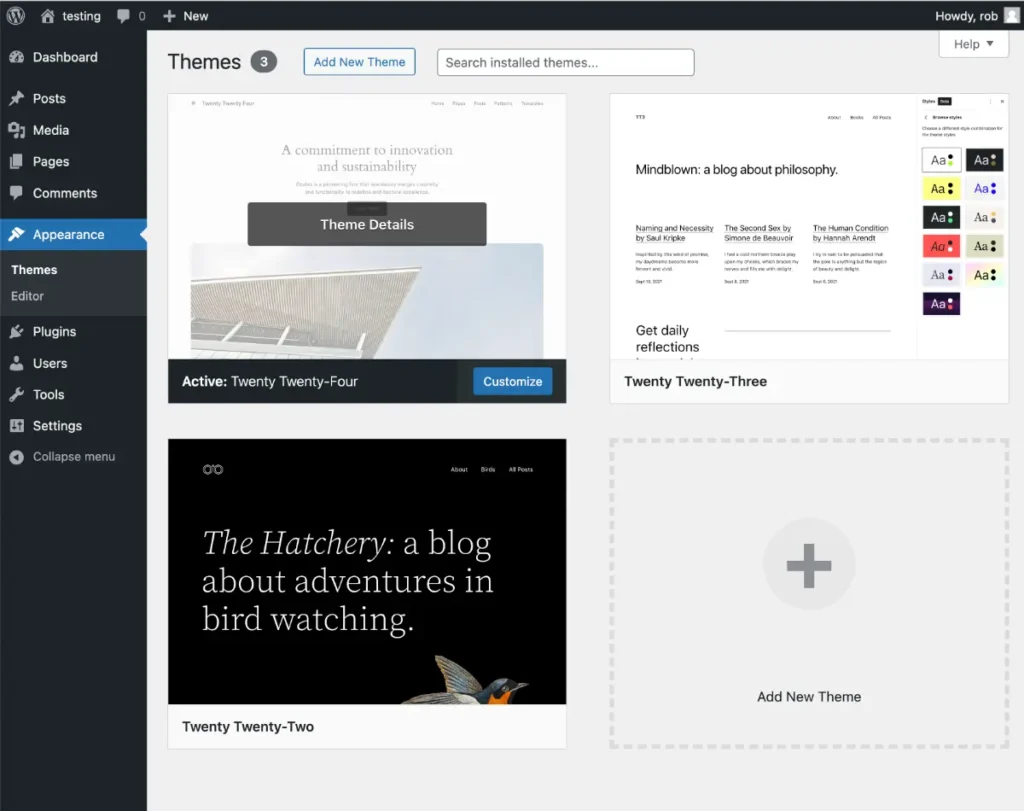
Switching WordPress themes is an easy way to change your website’s design and aesthetics instantly. The theme controls the overall layout, style and look of the site.
To change themes:
- Go to Appearance » Themes
- Browse the themes that come bundled with WordPress or choose from the massive catalogue on WordPress.org.
- Preview the themes by activating them temporarily
- Once you find one you like, install and activate it
- Customise it further using options like widgets, menus and theme settings
Premium themes let you customise the design even more deeply without requiring you to know the code. They form the foundation for creating beautiful websites tailored to your brand.

Managing Comments and User Interactions
Allowing readers to comment fosters engagement and discussions on your site. WordPress offers robust tools to manage user comments, including:
- Moderating new comments before they appear publicly
- Marking comments as spam to prevent unwanted traffic
- Replying directly to commenter’s questions or remarks
- Sending notifications when new comments are posted so you can respond promptly
To adjust your preferences on how comments work, visit Settings » Discussion in the dashboard and configure options like comment approvals, spam filtering strength and notification triggers.
Creating a vibrant community enhances loyalty among your readers and keeps them coming back for more!
Extending Functionality with Plugins
While WordPress themes control the appearance, plugins add incredible functionality to your site. Over 50,000 free plugins offer just about any feature you can imagine.
To find and install plugins:
- Go to Plugins » Add New
- Search or browse the catalogue
- Click Install, followed by Activate for the desired plugin
Some must-have beginner plugins:
- Yoast SEO: for optimising content
- WP Super Cache: to speed up load times
- Smush Image Compression: squeezes images
- BackUpWordPress: for site backups
Over time, keep updating plugins to the latest versions for best performance, compatibility and security.
Securing Your Website
Maintaining site security should be your topmost priority as a site owner. Here are some vital security best practices:
- Set secure passwords and change them periodically
- Keep WordPress, themes and plugins updated always
- Limit user roles and permissions to only those required
- Back up the site regularly in case you need to restore
- Install a security plugin like Wordfence for additional protection
While this may seem intimidating for beginners, by taking it step-by-step and using the simplicity of WordPress, you can have a safe and robust website.
Troubleshooting Common Issues
And finally, I wanted to provide some quick solutions to a few common issues you might encounter:
You get locked out of the admin area
- Go to your hosting provider and reset your password
- Use an FTP app to remove plugins recently installed
Your site shows a “White Screen of Death.”
- Temporarily rename/delete the theme’s functions.php file
- Turn off all plugins to identify conflicts
Media images do not appear on the frontend
- Try regenerating thumbnails
- Check the file/folder permissions on the server
These are just a few common examples – but don’t worry, with the helpful WordPress community forums online, you can get assistance quickly whenever needed!
Wrapping Up
Congratulations, you made it to the end of my beginner’s guide on taming the WordPress dashboard! You can now navigate and manage your site comfortably like a seasoned pro.
WordPress offers many possibilities to create a feature-rich website tailored to your unique needs. I hope you’re feeling more empowered to start your website-building journey!
Meta Trends has web design services for Australian Businesses.
As always, feel free to comment below if you have any questions. I try to answer every query from our outstanding community members who want to learn more.
