Choosing & Installing WordPress Themes: The Basic Guide

wordpress theme guide

G’day folks! Alex here, your friendly WordPress wizard ready to shed some light on the wonderful world of WordPress themes. I know themes can confuse beginners – I vividly recall spending hours customising my first WordPress site and wondering if I was over my head. But themes are genuinely what makes WordPress so powerful and versatile.

Whether you’re looking to give your site a visual refresh, add some new functionality, or finally launch that website you’ve been dreaming about, themes are where it all starts. In this post, we’ll break down everything you need to know to find, install, customise, and maintain WordPress themes so you can build a site you love. Stick with me, mates!

Understanding WordPress Themes: More Than Skin Deep

Simply put, a WordPress theme controls your site’s overall design and front-end display. It’s the interface visitors interact with when they land on your web pages. Themes allow you to customise everything from colours, fonts, and layouts to more advanced features like slideshows, portfolios, and page builders without writing code from scratch.

But don’t be fooled into thinking themes are just about looks! Themes incorporate PHP, HTML, CSS, and JavaScript to add functionality that lets you easily create new WordPress posts and pages with drag-and-drop simplicity. For example, theme post-type templates transform basic commands into polished portfolios, testimonials, staff profiles, and more.

Themes bridge the gap between WordPress core software and your aspirations for what you want your website to be. With thousands of free and premium themes, you’ll find one that brings your vision to life!

Choosing a WordPress theme

Free vs. Premium WordPress Themes: Weighing the Pros and Cons

New WordPressers often ask me, “Should I use a free or premium theme?” The answer, as you might expect, is that it depends! Let’s break down the distinguishing factors:

Free WordPress themes

Pros

  • Cost-effective (free is good!)
  • Offered in the official WordPress theme directory
  • Beginner-friendly and easy to use
  • Wide selection

Cons

  • Limited features and options
  • Less customisation flexibility
  • Less ongoing support
  • Higher chance of bloat or security vulnerabilities

Premium WordPress themes

Pros

  • More design options and page builder tools
  • Better support and documentation
  • Advanced functionality/features
  • Regular updates
  • There is a lower chance of bugs or security risks

Cons

  • Cost money to purchase
  • Potential lock-in to proprietary frameworks
  • Steeper learning curve

My recommendation? Start with a free theme while getting the hang of WordPress, then consider upgrading to the premium for enhanced features and functionality. Finding a theme aligned with your goals, audience, and technical abilities is vital.

WordPress Theme Directory

Defining Your Theme Requirements

I always tell my clients: Don’t fall victim to shiny object syndrome! Just because a theme looks slick doesn’t mean it’s the right fit. Before theme shopping, clearly define your vision and must-haves:

  • Purpose – What is your website all about, and what do you want to achieve? Brainstorm the pages and features you need.
  • Audience – Who are you creating this for? What do they care about?
  • Look and feel – What is the desired tone, colours, images, etc.? What content types do you need (blog, services, store)?
  • Functionality – Required features like contact forms, galleries, and slideshows. Integrations with plugins you plan to use.
  • Technical abilities – How comfortable are you modifying code or troubleshooting issues?

Outlining these criteria will make finding “the one” much smoother!

Where to Find the Best WordPress Themes

Armed with your theme wish list, it’s time for the fun part – browsing! I recommend checking out these go-to sources:

1. WordPress Theme Directory

The official WordPress Theme Directory should be your first stop. It offers thousands of free, WordPress-approved themes spanning genres like blogging, business, portfolio, magazine, and WooCommerce storefronts.

Themes available here are vetted for security, quality code, SEO optimisation, and overall best practices so you can feel confident installing them. While the choice is stellar, advanced customisation and functionality are limited compared to premium themes.

2. Premium Theme Marketplaces

If you desire more complex site-building tools, premium theme marketplaces like ThemeForest, Elegant Themes, or CSSIgniter offer a stellar selection. Prices range from $40 – $60+ for themes packed with page builder integration, advanced typography controls, extensions/add-ons, and more.

The downside? It can be tricky to evaluate quality with so many choices. More on that next!

3. Niche Theme Providers

Are you seeking an ultra-targeted theme? Check out niche providers catering to specific sectors like restaurants, bands, non-profits, or conferences. A more honed focus often means better-tailored functionality.

For example, WooThemes has fantastic eCommerce themes, integrating seamlessly with popular plugins like WooCommerce and MailChimp. DIYthemes offers multi-purpose magazine-style designs perfect for online publications.

4. Custom Theme Designers

Custom theme development may be the answer if you have an exceptionally defined vision or complex project. Designers will work 1-on-1 to craft a 100% custom, purpose-built theme functioning just as you envisioned.

The process is more involved, requiring documenting needs and specifications and providing feedback on mockups and theme iterations. But the result is a unified site tailored precisely to you.

Top custom shops like Pixelgrade or Froont offer fixed packages starting around $1500+. Shop around and read reviews carefully when evaluating custom designers.

Installing WordPress Theme

Assessing Theme Quality: What To Look For

Theme hunting can quickly get overwhelming, with many options spanning design aesthetics and code quality. Here are critical indicators of winning themes:

Responsive Mobile Design

Today, the majority of website traffic comes from mobile devices. Ensure themes pass Google’s Mobile-Friendly Test across devices. Page layouts should flex to fit screen sizes without horizontal scrolling or cramped formatting.

SEO Optimizations

Your content can only rank if search engines can easily crawl, index, and extract meaning from your pages. Quality themes integrate schema markup in templates for better SEO and optimised page speed.

Regular Updates

Themes require ongoing maintenance and patches as WordPress core evolves. Frequent updates indicate developers are still actively supporting their product. Automatically updated notifications also make maintaining security and compatibility a breeze.

Positive Reviews

Nothing substitutes for first-hand experiences! Plugin and theme repositories with strong review averages (4+ stars) demonstrate happy users. This suggests quality code, good documentation/support channels, and intuitive design.

Extensibility

Even the most feature-packed themes can’t satisfy every need. Extensibility refers to how easily themes integrate with plugins to add advanced functionality like forms, galleries, sliders, and e-commerce. The best balance code bloat with strategic hooks and filters to augment features via plugins.
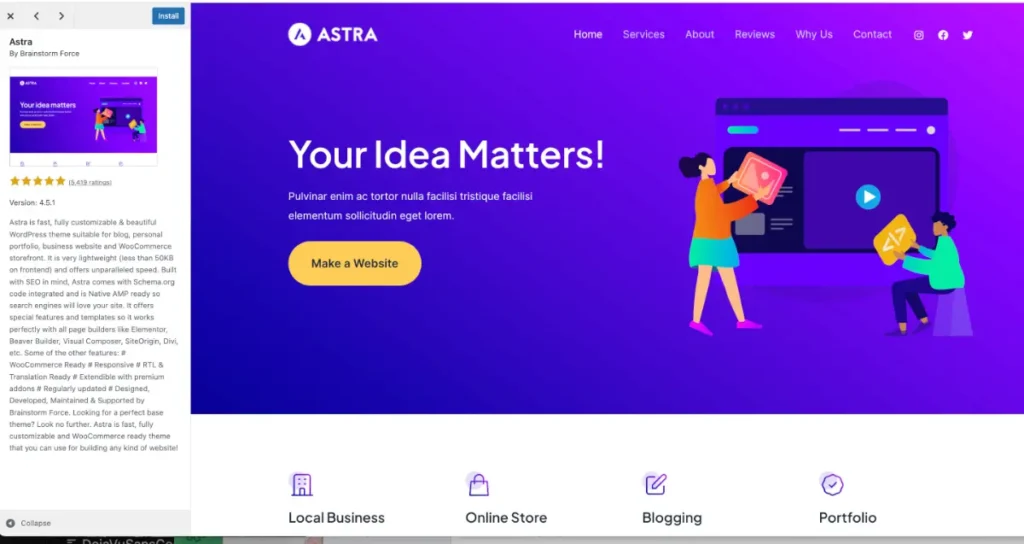
Demo Content

Pre-populated demo sites allow you to test drive a theme and experience the full breadth of layouts and design options before installing. Be sure to poke around menus, widgets panels, and settings to understand what’s possible.

While an exhaustive list, these six factors go a long way in benchmarking theme quality!

Installing and Activating New Themes

Once you’ve picked a winner, it’s time! Here is the nitty gritty on getting themes running on your site.

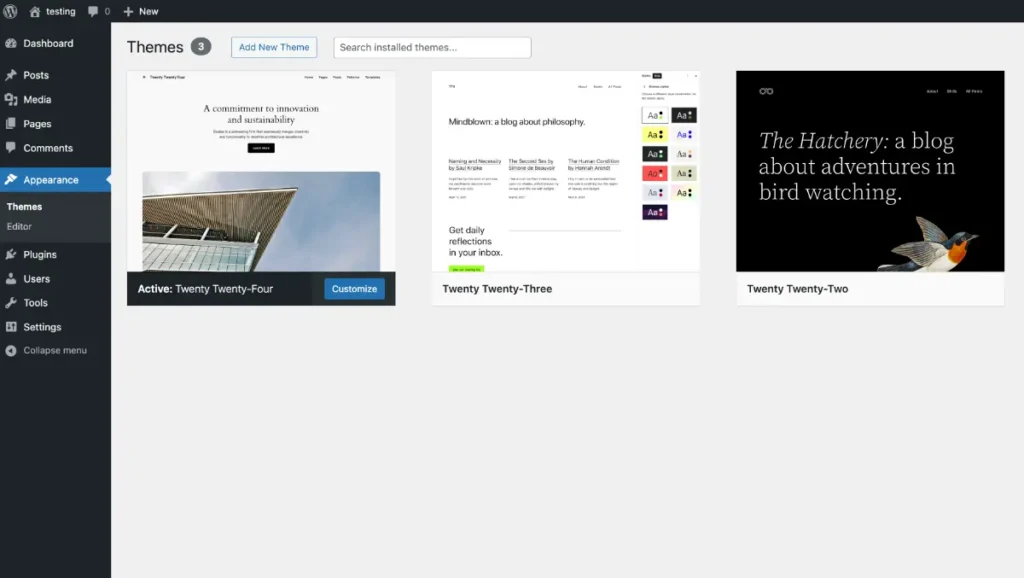
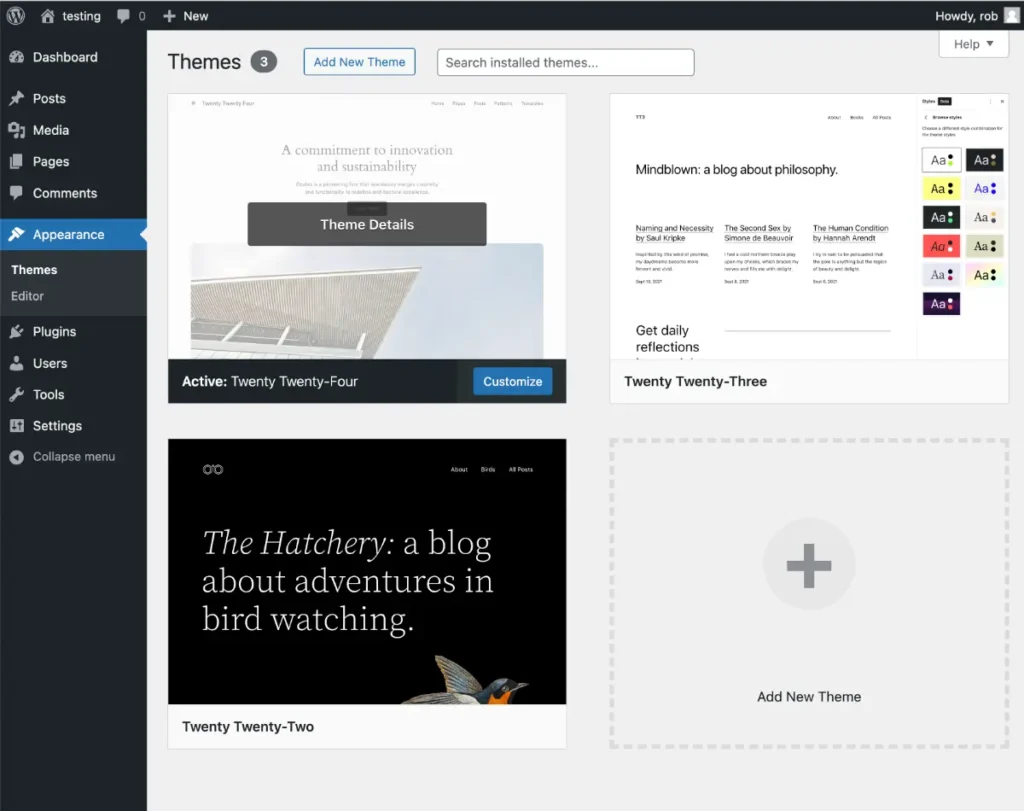
Via WordPress Dashboard

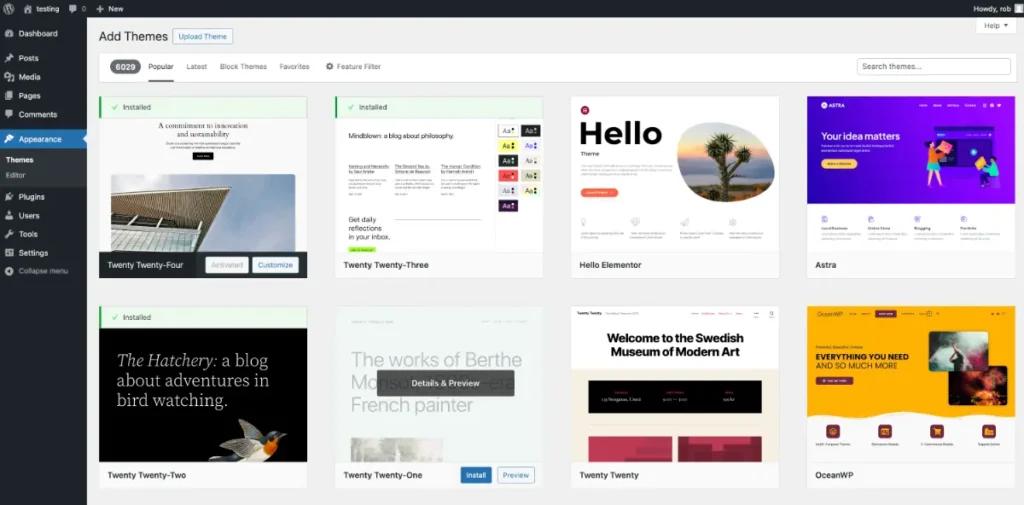
Most themes can be installed directly within your WP dashboard. Navigate to Appearance > Themes. Next:

  1. Click “Add New”.
  2. Search or browse for your chosen theme and click “Install”.
  3. Wait for WordPress to download and unpack files.
  4. Click “Activate” to launch your new theme!

That’s it! Your site will now reflect the new theme design and functionality.

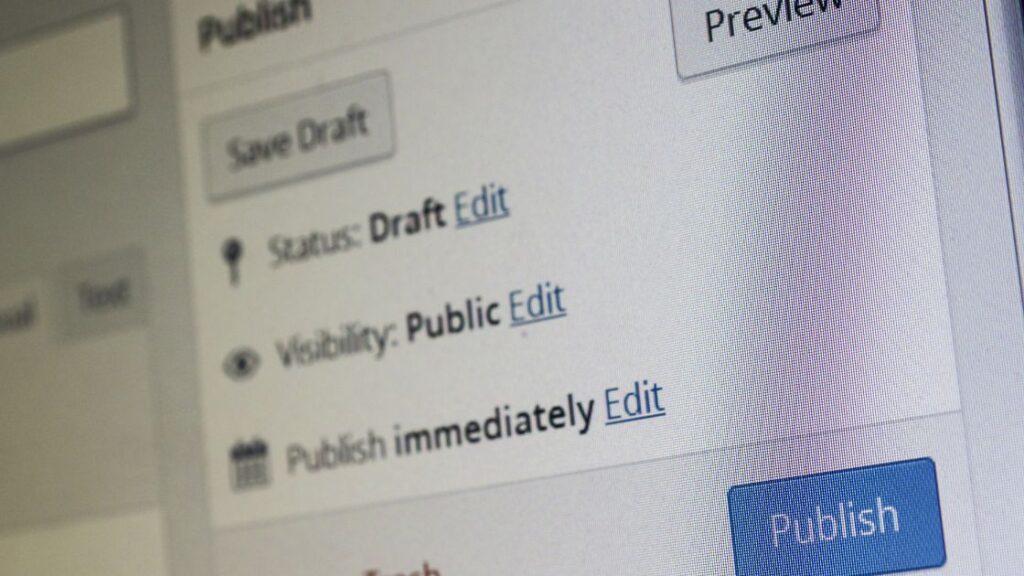
Pro Tip: Always back up your site before changing themes in case you need to roll back or reference old settings!

Via FTP

Alternatively, you can manually upload theme zip folders using FTP file transfer:

  1. Download and unpack your theme on your computer.
  2. Using an FTP client, connect to your host server credentials.
  3. Navigate to /wp-content/themes/ and upload the theme folder.
  4. Return to your WP dashboard Themes page to activate.

FTP allows the installation of more significant, complex themes with extensive files. This can be tricky for beginners, so stick with the WP uploader if possible!

Activating/Deactivating Themes

You can quickly hot-swap themes to preview options. Under Appearance > Themes, hover over a theme thumbnail and click:

  • Activate – To make the theme live
  • Deactivate – To revert your site to the previous theme

No need to uninstall themes! Deactivating automatically rolls back settings.

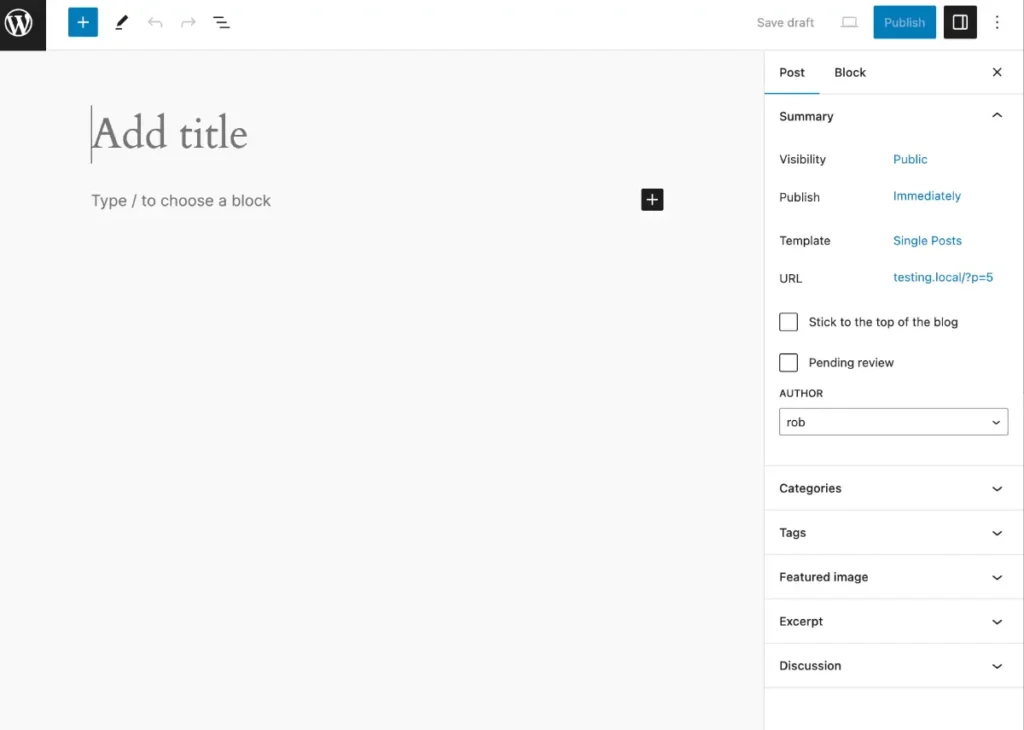
Customising Your Active Theme

Now for the best part: making your theme distinctly you! Most editing happens under Appearance > Customize. Here you can tweak:

  • Colours
  • Fonts
  • Logos
  • Headers
  • Footers
  • Layouts
  • Widgets

I suggest exploring every setting – themes hide all sorts of gems! Child themes keep modifications separate from core code for even deeper customisations when parent themes receive updates.

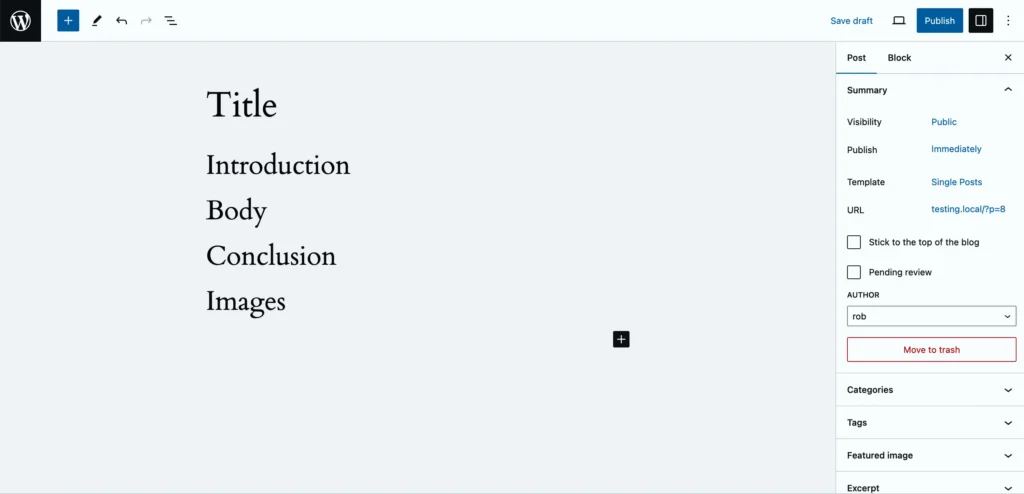
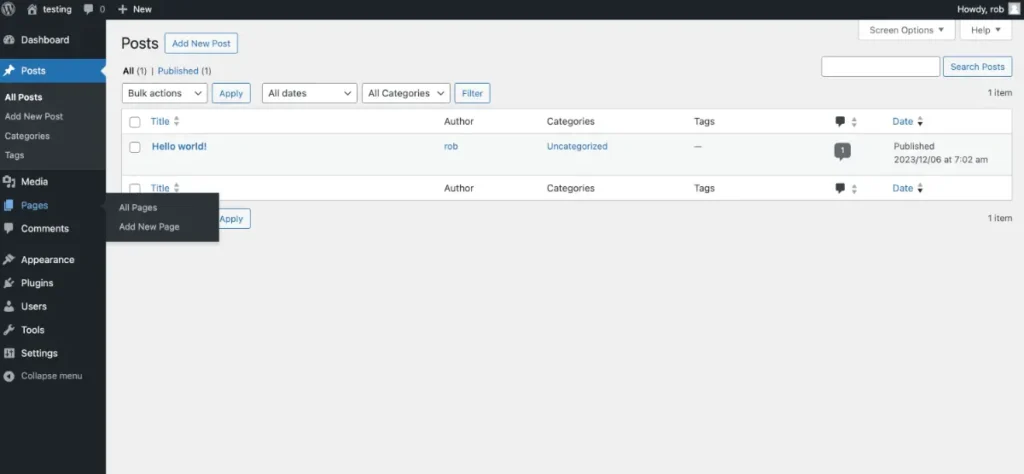
Creating a child theme ensures your added CSS, templates, and functions won’t be overwritten. It’s a neat way to build on existing themes while maintaining access to features and support from the parent. Pages vs Posts.

Fantastic child themes plugins like Child Theme Configurator handle the technical stuff for you. Working between parent and child themes gives maximum control to shape your vision.

Maintaining Happy, Healthy Themes

Like changing the oil in your car, some theme maintenance keeps sites humming:

Regular Backups

Unforeseen mishaps can corrupt theme settings and styles. Regular backups let you roll back changes with one click via versioning plugins like UpdraftPlus.

Updates

It’s critical to keep themes, WordPress, and plugins updated. Updates patch security flaws and keep compatibility current as web standards evolve. Fortunately, WordPress can auto-update everything in the background.

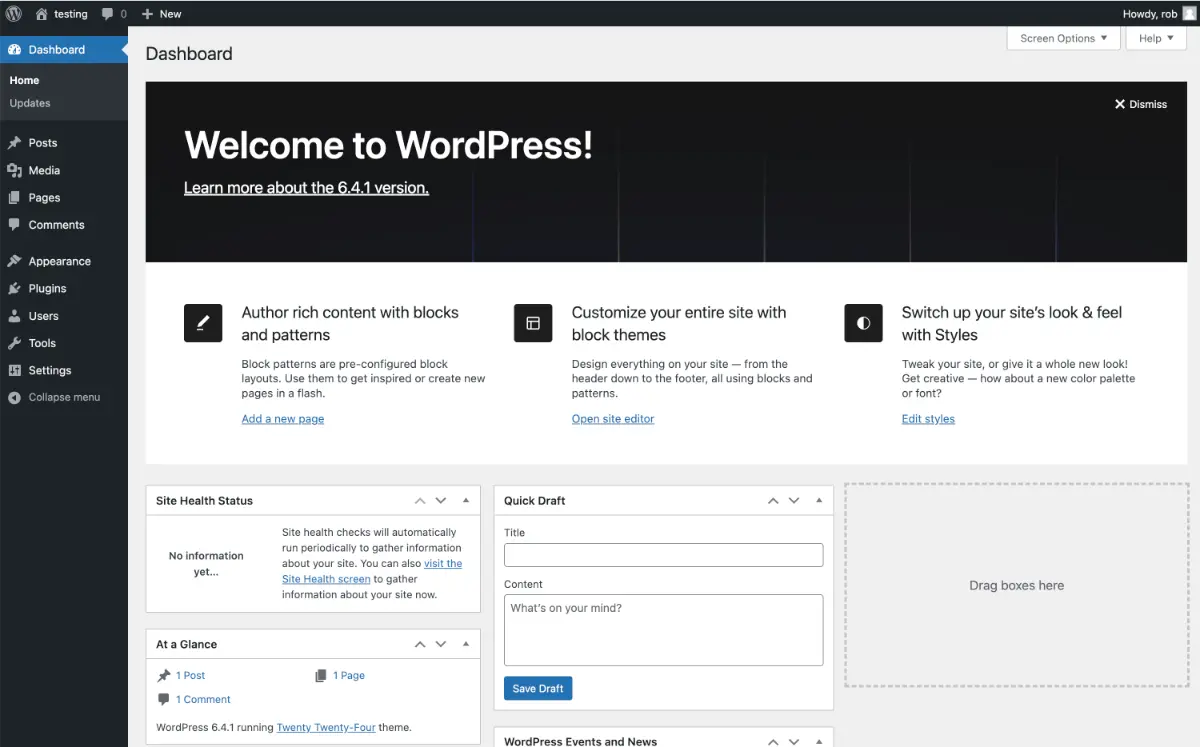
Under Dashboard > Updates, enable auto-updates for peace of mind. Monitor notification emails in case manual actions are ever required.

Troubleshooting Issues

Sometimes, glitches happen after major WordPress or theme updates. Sites may load funky CSS styling, and plugins suddenly conflict or feature break. Don’t panic!

First, check support forums related to your theme for advice. Often, the problem is already documented with known fixes. Then, try selectively deactivating plugins to isolate conflicts. For CSS issues, transparent cached files.

In dire situations, roll back to a previous version with a backup tool like UpdraftPlus and migrate changes selectively.

Wrapping Up

We’ve covered a whole lot of ground here! By now, you should feel empowered to:

  • Choose awesome free or premium WordPress themes
  • Seamlessly install and activate themes
  • Customise themes to match your brand
  • Maintain healthy themes with backups and updates

Are you still feeling overwhelmed? No worries! Start slowly and lean on the amazing WordPress community. The posts here on Meta Trends are a fantastic place to get feedback and ask questions among friends. If you need a website built, Meta Trends develops custom WordPress sites for businesses like yours.

Onwards with your new skills, my friends! I can’t wait to see the next generation of sites you build as your journey with WordPress continues. Never hesitate to drop me a line with any hiccups along the way.

Happy theming!

Essential WordPress Settings for Your New Website

essential wordpress settings

G’day All! Alex here from Meta Trends, guiding you through setting up your new WordPress website. As a seasoned WordPress developer with over ten years under my belt, I’ve helped both small startups and large companies build and optimise their online presence.

In this beginner’s guide for WordPress, I’ll be sharing my top tips on essential settings you need to configure to ensure your website is set up for success. Whether you just finished installing WordPress for the first time or hired a developer to build your site, this comprehensive walkthrough will help you understand key concepts from basic setup to security, SEO enhancement, media management, integrations, backups, and more!

Getting Started with WordPress Installation

Before jumping into website settings, let’s quickly go through WordPress and how to install it.

WordPress is open-source software that powers over 40% of all websites on the internet. It started as a blogging platform but has evolved to be used for all kinds of sites, including e-commerce stores, magazines, member sites, and more.

Some key reasons why WordPress is so popular:

  • Easy to use and manage
  • Extremely customisable
  • Scales well for sites both small and large
  • It has a vast plugin and theme ecosystem
  • Completely free and open-source
General WordPress Settings

When installing WordPress, you generally have two options:

  1. One-click installer: The fastest way to install WordPress is by using an auto-installer provided by your web host. This handles all the technical aspects behind the scenes.
  2. Manual installation: You can download WordPress from WordPress.org and manually upload it to your web server. This gives you more control over the process.

I recommend using a one-click installer for beginners as it saves the hassle of database configuration and other complex steps required for the manual installation of WordPress.

Now that we’re clear on how WordPress is installed let’s look at the essential settings you need to configure for your site.

General Settings

General settings allow you to configure some core options related to your site name, URLs, administrator email address and more. To access general settings, visit Dashboard > Settings > General in your WordPress admin.

Site Identity

These settings control your site title, tagline, logo, etc. Things to note:

  • The site title and tagline are displayed on all frontend pages. Most WordPress themes show the title in the header section.
  • Make sure you upload a logo image if your theme supports it. An eye-catching logo adds legitimacy and brand consistency across your site.
  • Keep the site title and tagline short, crisp and descriptive of what your site is about.

Administrator Email Address

This email address receives all WordPress notifications, including comments, failed login attempts, plugin issues, etc. Things to remember:

  • Use an active email that you control and check frequently. Don’t use throwaway/unused addresses here.
  • You can enter multiple admin emails separated by a comma

WordPress Address (URL)

This is the address where your WordPress core files reside. Generally, you don’t need to make changes here unless you intend to move hosts or migrate sites.

Site Address (URL)

This is the address where your site homepage and frontend pages will be accessed. The WordPress Address (URL) and Site Address (URL) will be identical for most simple sites.

Writing Settings

Writing settings allow you to set the default behaviour for creating content on your site. You can access writing scenes via Dashboard > Settings > Writing.

WordPress Writing Settings

Default Post Category

Any new posts you create will be auto-tagged with this default post category. I recommend something generic like “Blog” or “News”.

Default Post Format

Post formats allow your content to be styled differently based on the form. For example, you can have a Video post format to display embedded videos differently from image posts or standard text posts. Most beginners can leave this set to “Standard”.

Update Services

Allow or turn off pinging services when a post is published. This alerts platforms like Twitter via their API that new content is available. Keep this enabled to circulate recent posts to your social media followers automatically.

Reading Settings

Reading settings primarily control homepage behaviour and blog pages in WordPress. Access reading settings from Dashboard > Settings > Reading.

Your Homepage Displays

You can choose between two options here:

  1. Your latest posts are excellent for blogs and frequently updated sites! Your latest posts will show on pages visitors first come across.
  2. A static page: Choose this option if you want greater control over homepage content. Then, assign any page to be the “Front page” while posts get designated as the “Blog page”.

I recommend the classic blog-style homepage showing your latest content for most sites. But feel free to play around once you get familiar with WordPress!

Blog pages show at most.

Controls the maximum number of posts displayed per blog page. Keep this reasonably high for new sites building content, but set limits to prevent overwhelmingly long pages, especially for infrequent blog writers. Ten posts per page is a good compromise.

Pro Tip: More posts per page mean visitors must click less to access older content. But too many posts lead to excess scrolling. Strike a balance!

Syndication feeds

Enabling this shows a RSS feed link to broadcast your posts to various feed readers and aggregators. This expands your reach, so keep this turned on!

WordPress Reading Settings

Search Engine Visibility

By default, WordPress encourages search engine visibility. But you can toggle this off for an internal site if needed. Note that completely blocking search engines requires additional tweaks beyond this quick toggle.

User Accounts and Security

It’s essential to carefully manage user roles and permissions to maintain a secure site. Prevent unauthorised access by following these recommendations:

Site Administrators

Administrators possess the highest level of access. They can manage plugins, users, and site settings in every aspect of your site!

When creating the admin account, ensure you:

  • Use an email you own and control
  • Set a strong password that utilises uppercase, lowercase, numbers and symbols
  • Avoid generic usernames like “admin” that are easy to hack

Also, don’t add every client or team member as an admin unless necessary! Assign them lower privilege roles covered next.

Other WordPress User Roles

WordPress has several user roles with various access levels:

  • Editor: Add, manage, edit, publish all content
  • Author: Create, edit, and publish only their posts
  • Contributor: Submit content for review but cannot publish
  • Subscriber: Manage their account and access private content

Review permissions for each role carefully and only grant the minimum required access. For example, assign author roles to freelance writers so they don’t accidentally mess up site settings.

Follow the principle of least privilege here – don’t provide more access than necessary!

Plugins for Security Enhancements

With solid passwords and limited user roles, installing security plugins significantly reduces vulnerabilities.

Some plugins I recommend:

  • Wordfence – fully-featured security plugin that offers firewall protection, malware scans and blocks dangerous traffic
  • Sucuri – malware detection, remote site backups, DDoS protection and more
  • Limit Login Attempts – lockout intruders trying to guess passwords

These plugins are handy, especially if you expect high traffic volumes. But also utilise the essential tools outlined earlier for better protection.

SEO Optimization

Search Engine Optimization (SEO) allows your site pages to rank higher in search engines through tweaks to permalinks, metadata optimisation and more.

Utilise these settings to boost discoverability:

WordPress Permalink Settings

Permalink Settings

By default, WordPress offers web page-style permalinks with messy query strings.

Instead, go to Settings > Permalinks and choose one of the following:

  • Post name permalinks
  • Custom structure permalinks

Custom structures with keywords help pages get found more easily in search engines.

For example:

/blog/%postname%/

Looks cleaner than default permalinks and includes the post name!

Yoast SEO Plugin

One of the most popular SEO plugins for WordPress, Yoast SEO lets you optimise:

  • Meta titles & descriptions
  • XML sitemaps
  • On-page content with focus keywords
  • Breadcrumbs & more!

With over 5 million active installs, it provides immense value, especially for beginners with SEO.

The free version offers core features while premium plans provide detailed analytics into traffic sources and automated migrations.

Media Settings

Media settings control how images & files are handled in WordPress. Access settings via Dashboard > Settings > Media.

Image Sizes

WordPress creates images of different sizes to balance visual quality and site performance.

I recommend keeping default sizes for thumbnail, medium and large images. But feel free to add new dimensions for displaying images across themes and devices.

Lazy Load Images

Lazy loading only loads images visible on the screen while scrolling down pages. This significantly speeds up load times.

If supported by your theme, enable this for better performance. There are also plugins like EWWW and Smush that optimise images out of the box.

Media Library

The media library stores all images, docs, videos and files uploaded to your site. As this grows over time, use these tips to organise your library:

  • Add descriptions to media files for easier searching
  • Use technical names for naming media files
  • Create folders to group files (e.g. podcasts, ebooks, etc.)
  • Delete unused media to keep the library neat

Taking time to tag and arrange your media properly ensures they are easy to find later!

Discussion Settings

Discussion settings determine how readers can interact via comments, pingbacks, etc. Access discussion settings from the Dashboard > Settings > Discussion page.

Comment Moderation

You can approve comments manually, use a whitelist or let them auto-publish.

Moderate with relevant comments but block spam and abuse. This fosters genuine conversations without compromising site health.

Comment Ordering

Set comments to display from oldest to newest or vice versa. I prefer the latest listing since recent comments are most relevant to readers.

Threaded Comments

This feature visually groups comments into threads for easier following. The lines go only up to 10 comments before collapsing, which balances readability without getting chaotic.

Pingbacks & Trackbacks

Pingbacks notify you when somebody links to your content. Trackbacks allow readers to view conversations between blogs by displaying links between posts.

Since these help build links and site visibility, keep them enabled! Utilise the discussion dashboard widget to see pingbacks/trackbacks waiting for approval.

Privacy Settings

WordPress now forces you to configure a privacy policy as internet users become more concerned over data privacy.

Failure to create a policy results in blocked access to many core features and plugins, crippling your site!

Here are the steps to configure your privacy policy:

Generate a Privacy Policy

Under Dashboard > Settings > Privacy, click “Create your Privacy Policy”.

This brings up an editable policy covering user consent, GDPR and how user data on your site is managed.

The autogenerated content uses standard legal language to be broadly compliant for most basic sites.

Customise the Privacy Policy

However, personalise your privacy policy further with details relevant to your site’s specific tools, integrations and services dealing with visitor data.

Clearly state what data is collected and how it is processed. Identify security measures in place to protect collected personal information.

Your policy demonstrates respect for visitor privacy – so be transparent and offer contact information for further questions.

Once finalised, publish the privacy policy by toggling it to a Public status within your site.

Performance Optimization

Optimising WordPress performance is crucial since a slow site damages user experience and affects conversions across pages and posts.

Tweaks to caching, image compression and database cleaning significantly boost site speed.

WP Rocket Cache Setup

An excellent caching plugin to start with is WP Rocket. Features offered include:

  • Static HTML caching
  • Lazy loading for images/videos
  • File optimisation
  • Browser caching

Once installed:

  1. Enable options like Delay JS caching and Media lazy loading
  2. Set appropriate Cache Lifespan duration
  3. Configure cache exclusion rules for dynamic pages
  4. Toggle on Database Optimisation

WP Rocket offers solid performance gains quickly with minimal tweaking needed.

EWWW Image Optimizer

Another superb optimisation plugin is EWWW Image Optimizer.

With over 1 million active installs, EWWW can:

  • Losslessly compressed image formats like PNG, JPG, GIF, etc
  • Downsize images by increasing compression
  • Automatically resize huge images
  • Convert formats to improve compression
  • Optimise PDF attachments

With a caching plugin, EWWW’s image optimisation vastly reduces page size and load times.

The free version provides key features, while paid plans add cloud optimisation and integration with image editors.

Email Configuration

WordPress requires correct email configuration to ensure notifications, password resets, and user emails are reliably delivered.

The default PHP-based email transfer is unstable and prone to being flagged as spam.

Instead, use a dedicated SMTP service to securely:

  • Route all emails generated by WP
  • Avoid false spam flags
  • Gain deliverability monitoring to know emails reach reader inboxes!

For my client sites, I recommend Sendinblue SMTP. It’s free for up to 300 daily emails with good support and deliverability success.

But depending on the email volume needs of your site, explore options like Gmail SMTP, Sendgrid, Mailgun, etc.

Wrapping Up

Phew, that was a lot to cover! But I wanted you to have this WordPress Beginner’s Guide covering both basics and advanced tips to properly configure your site.

To recap, essential settings exist across:

  • General site name, URLs
  • Writing defaults for content
  • Reading settings that control homepages & RSS
  • User security via permissions & plugins
  • SEO optimisation using Yoast
  • Media handling procedures & plugins
  • Comment moderation systems
  • Privacy policy and compliance
  • Performance through caching & image optimisation plugins
  • Reliable email via SMTP

It may seem intimidating initially, but take it one step at a time. Follow along with the settings outlined here, leverage the flourishing WordPress community forums if stuck, and your site will soon be running as smoothly as the Australian waves!

If you need help designing your business website, reach out for help.

So grab your surfboard, snorkel gear… err, login credentials and build an incredible online presence! Feel free to drop any setup questions in the comments – I’ll try my best to help!

Alex has been guiding you through the WordPress Beginner’s Guide. Until next time, cheers!

How to Create Your First Post in WordPress

create wordpress post

Welcome to my step-by-step guide on publishing your first-ever post using WordPress. Whether you’re looking to start a blog, run an e-commerce store, or simply share your ideas online, mastering WordPress content creation basics is essential. As a seasoned WordPress professional, I’ll show you everything from setting up your website to scheduling posts for search engine success. Let’s get cracking!

Getting Started with WordPress

Before we dive right into creating content, it’s essential to understand what WordPress is. In a nutshell, WordPress is a flexible content management system (CMS) that powers over 40% of all websites. The core platform is open-source, meaning anyone can use and modify it for free.

So, what sets WordPress apart from traditional website builders? Two key advantages:

  • Customisation: WordPress offers thousands of themes and plugins to tailor the design and functionality. This allows you to create truly unique sites.
  • Content Focus: With WordPress, your website dynamically displays content from a database. This content-first approach makes managing blogs, news sites, membership portals, and online stores easy.

Now that you grasp the basics let’s explore the two main ways average users interact with WordPress:

The WordPress.com route means they handle all the hosting and security for you. The tradeoff is less flexibility compared to the self-hosted open-source version. But fret not! I’ll cover both scenarios in this guide.

Post from the dashboard

Accessing the WordPress Dashboard

To begin your WordPress journey, you need access to the administrative dashboard. Consider this your mission control for content creation and website management.

WordPress.com

If using the hosted WordPress.com platform, simply:

  1. Go to www.wordpress.com
  2. Click on “Log In”
  3. Enter your WordPress.com username and password

That’s it! The dashboard lets you create post pages and modify your site’s design and settings.

Self-Hosted WordPress.org

For the open-source WordPress.org software, you’ll need:

  • A domain name (your website address)
  • Web hosting configured for WordPress

Once you have a hosting setup, follow these steps:

  1. Navigate to your domain name
  2. Find and click the “wp-login” page link
  3. Enter the username and password for your WordPress admin account

This login grants you access to the all-powerful dashboard for managing your self-hosted WordPress site. Should you create a page or post?

Creating Your First Post

Now for the fun part – let’s publish your first post!

WordPress refers to posts as the chronological articles, stories, blog entries, and announcements that comprise the primary content. Posts typically show on your blog page or related category and tag archives.

Accessing the Post Editor

WordPress.com

  1. Click “My Site” and select “Blog Posts”
  2. Click the blue “Create a Post” (or “Create Blog Post”) button

WordPress Self-Hosted

  1. Hover over “Posts” in the left sidebar
  2. Click on “Add New.”

This will open the post editor – your one-stop shop for crafting remarkable blog posts.

Structuring Your Post

The key to writing compelling posts lies in proper structure and formatting. Here are my top tips for organising your content:

  • Headline – Summarize the essence of your post in 55 characters or less
  • Introduction – Explain the purpose and set reader expectations
  • Body – Elaborate on your main ideas with research, examples, and anecdotes
  • Conclusion – Recap key points and include a call to action if needed
  • Images – Break up text with relevant photos, graphics and visual media
  • Links – Provide references and links to external sources where applicable

Follow this basic structure using the block editor’s headings, paragraphs, lists, quotes, and more to make your content scannable and compelling.

Structuring Your WordPress Post

Enhancing Your Post

WordPress offers built-in options to enhance your posts, including:

Featured Images

Also known as post thumbnails, featured images appear prominently on your blog page, social media shares, and Google search listings. For best results:

  • Upload an eye-catching, relevant image
  • Optimise it to load fast
  • Choose landscape dimensions for flexibility

Categories

Categories help group related posts together. For example, you may have an “Ocean Conservation” category containing articles on sustainability. Use categories liberally to organise your site’s content.

Tags

Whereas Categories are broad topics, Tags add more granular details on specific subjects within a post. For instance, you could tag an article on coral bleaching with “Environment” and “Climate Change”. Tags aid content discovery.

Excerpts

Excerpts are short descriptions previewing your post content. Much like a movie trailer, well-written excerpts entice readers to click and view the full article.

By leveraging these enhancements strategically, you’ll amplify your post’s visibility and engagement.

Reviewing and Publishing Your Post

Before officially publishing, always review your post thoroughly using the preview button. This displays exactly how your content will appear once live. Spend time checking for typos, formatting issues, broken images or links.

When ready, click “Publish” for your post to go live immediately. Alternatively, you can schedule posts to publish automatically in the future – perfect for social media marketing campaigns.

Under the “Visibility” setting, you can also password-protect posts or privately share them with just your team. WordPress lets you control precisely who sees your content.

Finally, don’t forget to share your newly minted blog post on social media! Connect your accounts in the WordPress settings accordingly.

And voila! With that, you’ve successfully created your first bit of blog content. Pat yourself on the back – it only gets more accessible and more fun from here!

Critical Differences Between Posts and Pages

Now that you know how to create standard WordPress posts, let’s discuss the distinction between posts and pages.

Posts are blog or news entries organised chronologically by publish date. Posts focus on time-sensitive content.

Pages contain more evergreen, static information like “About” or “Contact” details. Pages prioritise structure over chronology.

While both contain blocks of editable content, pages and posts serve different purposes:

  • Posts – Timely articles, stories and announcements
  • Pages – Static content like landing pages and core site info

Specific settings differ between page and post content in WordPress, from navigational menus to URL formats.

To manage consistency across your site, customise the format and design separately for posts and pages under the WordPress Settings > Reading page.

Expanding Your WordPress Skills

Creating that initial post marks a significant milestone, but it’s the first step in mastering WordPress content creation.

Here are some recommended next steps:

  • Experiment with multimedia – Embed video, audio, surveys and more to create multi-dimensional storytelling
  • Explore plugins – Extend WordPress capabilities using plugins like contact forms, e-commerce and SEO
  • Use reusable blocks – Design customizable content blocks to efficiently maintain site-wide standards
  • Collaborate with teams – Invite contributors, editors and administrators to publish collaboratively

The more you use WordPress, the more adept you become. Stay curious, embrace creativity, and have fun showcasing your ideas online. If you want Meta Trends to create a fantastic custom website for your business, please get in touch.

So tell me – what will you publish next? Which topics excite you? I’d be thrilled to hear about your WordPress plans and answer any questions you have.

Let your blogging adventure begin! Write on, mate!

WordPress Pages vs Posts: Understanding the Key Differences

Wordpress Pages vs Posts

G’day everyone! Alex here from Meta Trends with an overview of one of the most common questions I get from WordPress beginners – what is the difference between pages and posts? It may seem obvious once you know, but there’s more nuance to it. Strap yourself in as I break it down for you!

Pages and Posts: The Basics

First, let’s quickly recap what pages and posts are in WordPress:

  • Pages – For static, timeless content like “About Us,” “Contact,” “Services,” etc.
  • Posts – For dynamic, date-based content like blog updates, news, articles, etc.

The key difference is that pages are static while posts show the latest updates in reverse chron chronological order.

So broadly speaking, if you want a section of your site to showcase constantly changing content, use posts. If you want to create permanent self-contained pages, go with regular pages. But there’s more to it, so let’s dig deeper!

Pages and Posts

Page Hierarchy vs Post Categories

Here’s where things get interesting. Pages can have parent pages and child pages. This allows you to structure your content according to a hierarchy:

Parent Page
-- Child Page 1
-- Child Page 2 
---- Grandchild Page

For example:

About Us (Parent)
-- Our Team (Child)  
-- Our Story (Child)
---- Humble Beginnings (Grandchild) 

This is great for complex sites that need structured navigation.

Posts don’t quite work like that. Instead they use categories and tags to organize content:

  • Categories – For broad topics like “News,” “Reviews,” “Tutorials,” etc.
  • Tags – More granular organization based on specific details. Helps with SEO too.

So posts can belong to multiple categories and tags, allowing flexible organization. Much better for blogs and frequently updated sites.

This structures the difference nicely: pages are organized hierarchically while posts can use overlapping categories and tags.

About us page

Technical Differences

There are several key technical differences under the hood between pages and posts as well:

FactorPagesPosts
Content Typepagepost
Template Filespage.phpsingle.php, index.php, archives.php
In RSS Feed?NoYes
Have Publish Date?NoYes
Use Authors?RarelyYes
Allow Comments?SometimesYes

This table summarizes the main variations – pages use page.php, don’t show in RSS feeds, don’t need authors or dates, and sparingly have comments.

Posts leverage all those structured post features like dates, authors, feeds etc. And templates like single.php and index.php handle post archives and listings.

So under the hood, pages and posts function quite differently even though they may look similar from the outside!

Real World Use Cases

Let’s take a look at some real world examples where the page vs post difference comes into play:

  • You create a page for your “About Us” company history and team bios. This content doesn’t really change so a static page makes sense.
  • You write a post reviewing the latest version of the Hello Elementor theme. This review is timely and will eventually get outdated, so a post is appropriate.
  • Your site needs a page for the privacy policy and terms & conditions. Legal pages need to be static and visible.
  • You publish a post announcing a new release of your plugin. Release notes need to go out to RSS feeds so site visitors and news outlets can stay updated.

So in summary:

  • Use pages for most static site structure and key info
  • Use posts for your blog, news updates, announcements etc

This will cover most use cases. But as you start digging into your WordPress settings, you’ll unlock more advanced options…

Wordpress Post

Beyond Pages and Posts

Once you get familiar with WordPress’s basic concepts in the WordPress Beginner’s Guide, you can explore more advanced features:

  • Custom Post Types – To create custom structures like portfolios, events, testimonials etc.
  • Custom Fields – Adds extra metadata like ratings, prices etc to pages and posts.
  • Page Templates – Custom layouts for landing pages, sales funnels, directories etc.

With those you can bend WordPress to create almost any custom content structure you need!

But I always recommend starting simple with regular pages and posts first. Once you master those, you’ll intuitively know when you need something more advanced.

To Sum Up…

Let’s recap what we learned:

  • Pages are for static site content organized hierarchically.
  • Posts are for dynamic blog updates organized by categories and tags.
  • Under the hood, pages and posts function quite differently.
  • Real-world sites need both pages and posts in most cases.
  • More advanced options open up custom structures beyond pages and posts.

This clears up the difference between the two and gives you the confidence to build your site! If you would like Meta Trends to build a site for your business, please get in contact.

Let me know in the comments if you have any other questions. If you found this helpful, share it with fellow WordPressers looking to master this concept.

Stay tuned for more tips soon! G’day for now!

Your Guide to the WordPress Dashboard: A Beginner’s Tour

WordPress Dashboard

Hello friends! As an experienced WordPress developer, beginners often ask me how to use the WordPress dashboard to manage their websites. The dashboard can seem intimidating at first, but once you get the hang of it, you’ll find that WordPress offers a compelling and flexible way to manage your site’s design and content.

In this comprehensive tutorial, I’ll guide you through the various sections of the WordPress dashboard so you can learn how to create and edit content, choose WordPress themes, manage media, moderate comments, install plugins, and much more! By the end, you’ll be confident to use WordPress like a pro.

Introduction to the WordPress Dashboard

You’ll see the main dashboard when you first log in to your WordPress site. This is your central command station, where you can control almost everything on your site.

The dashboard UI is composed of the following key elements:

  • Left sidebar menu: Provides quick navigation to all areas of your site, like posts, pages, appearance, plugins, etc.
  • Dashboard widgets: Mini apps providing at-a-glance information.
  • Toolbar at the top: Provides one-click access to standard functions.

You can customise what sections, menus and widgets appear on your dashboard for quick access to the items you use the most. I’ll get into customisation options later in this article.

WordPress Posts

Creating Your First WordPress Post

Ready to dive in and create your first WordPress post? Here’s a quick step-by-step guide:

  1. Click on Posts » Add New in the left sidebar.
  2. Enter a title at the very top for your post.
  3. Write the content for your post in the main text editor section. You can format text, add links, insert media and more.
  4. On the right sidebar, select an appropriate category or create a new one.
  5. Once done, click Publish to make your post live!

It’s that simple. Now, look at some key concepts for managing your posts and pages.

Posts vs Pages

It’s essential to understand the difference between posts and pages in WordPress:

  • Posts are blog entries displayed in reverse chronological order on your blog page. They are usually short-form content.
  • Pages have no chronological order and are used for static content like your About page, Contact page, etc.

You can create and manage posts and pages from the respective sections in the WordPress sidebar menu. The process of making them is very similar to what you learned above.

Categories and Tags

Categories and tags help organise your content and make it more discoverable:

  • Categories group related posts under a common topic. For example, “Recipes” or “Product Reviews”.
  • Tags are more granular labels that describe specific details of a post, such as ingredients or custom taxonomies. For example, “chicken”, “dinner recipes”, or “WordPress tips”.

When writing posts, get in the habit of assigning one or more relevant categories and tags. Over time, these make it easier for readers to find the content they are interested in.

WordPress Media Settings

Enhancing Posts with Media

You can enhance your blog posts by inserting media like images, galleries, audio, video and documents. To add them:

  1. While editing your post, click the Add Media button.
  2. Upload files from your computer or choose existing ones from your media library.
  3. Once uploaded, insert them into your post at the desired location.

The media you upload is also available for reuse in other posts. Your media library is a centralised repository, allowing you to manage all your files easily.

Managing Your Media Library

Speaking of the media library, let’s discuss how you can organise and arrange your files. The WordPress media library stores all files you upload to your site, such as images, videos, audio files, and documents.

To access it, click on Media » Library in the sidebar.

From here, you can:

  • View, search and filter your uploaded media
  • Edit item titles, captions or descriptions
  • Organise files into folders
  • Permanently delete unused items

Taking a little time to structure your library will save you tons of time when publishing content down the road!

Customising Your Website with WordPress Themes

Switching WordPress themes is an easy way to change your website’s design and aesthetics instantly. The theme controls the overall layout, style and look of the site.

To change themes:

  1. Go to Appearance » Themes
  2. Browse the themes that come bundled with WordPress or choose from the massive catalogue on WordPress.org.
  3. Preview the themes by activating them temporarily
  4. Once you find one you like, install and activate it
  5. Customise it further using options like widgets, menus and theme settings

Premium themes let you customise the design even more deeply without requiring you to know the code. They form the foundation for creating beautiful websites tailored to your brand.

WordPress Themes

Managing Comments and User Interactions

Allowing readers to comment fosters engagement and discussions on your site. WordPress offers robust tools to manage user comments, including:

  • Moderating new comments before they appear publicly
  • Marking comments as spam to prevent unwanted traffic
  • Replying directly to commenter’s questions or remarks
  • Sending notifications when new comments are posted so you can respond promptly

To adjust your preferences on how comments work, visit Settings » Discussion in the dashboard and configure options like comment approvals, spam filtering strength and notification triggers.

Creating a vibrant community enhances loyalty among your readers and keeps them coming back for more!

Extending Functionality with Plugins

While WordPress themes control the appearance, plugins add incredible functionality to your site. Over 50,000 free plugins offer just about any feature you can imagine.

To find and install plugins:

  1. Go to Plugins » Add New
  2. Search or browse the catalogue
  3. Click Install, followed by Activate for the desired plugin

Some must-have beginner plugins:

  • Yoast SEO: for optimising content
  • WP Super Cache: to speed up load times
  • Smush Image Compression: squeezes images
  • BackUpWordPress: for site backups

Over time, keep updating plugins to the latest versions for best performance, compatibility and security.

Securing Your Website

Maintaining site security should be your topmost priority as a site owner. Here are some vital security best practices:

  • Set secure passwords and change them periodically
  • Keep WordPress, themes and plugins updated always
  • Limit user roles and permissions to only those required
  • Back up the site regularly in case you need to restore
  • Install a security plugin like Wordfence for additional protection

While this may seem intimidating for beginners, by taking it step-by-step and using the simplicity of WordPress, you can have a safe and robust website.

Troubleshooting Common Issues

And finally, I wanted to provide some quick solutions to a few common issues you might encounter:

You get locked out of the admin area

  • Go to your hosting provider and reset your password
  • Use an FTP app to remove plugins recently installed

Your site shows a “White Screen of Death.”

  • Temporarily rename/delete the theme’s functions.php file
  • Turn off all plugins to identify conflicts

Media images do not appear on the frontend

  • Try regenerating thumbnails
  • Check the file/folder permissions on the server

These are just a few common examples – but don’t worry, with the helpful WordPress community forums online, you can get assistance quickly whenever needed!

Wrapping Up

Congratulations, you made it to the end of my beginner’s guide on taming the WordPress dashboard! You can now navigate and manage your site comfortably like a seasoned pro.

WordPress offers many possibilities to create a feature-rich website tailored to your unique needs. I hope you’re feeling more empowered to start your website-building journey!

Meta Trends has web design services for Australian Businesses.

As always, feel free to comment below if you have any questions. I try to answer every query from our outstanding community members who want to learn more.

WordPress.com vs WordPress.org: Making the Right Choice

WordPress.com vs WordPress.org

Hey everyone, Alex here! As an experienced WordPress developer, I am often asked about the differences between WordPress.com and WordPress.org. It can get confusing with similar names, so that I will break it down for you in this post.

A Brief History

First, let’s do a quick history lesson. WordPress started as an open-source blogging platform you could download and install on your web server (WordPress.org). Then, in 2005, the company Automattic launched WordPress.com – a hosted version of WordPress. So essentially:

  • WordPress.org: original open-source WordPress software you download and host yourself
  • WordPress.com: hosted WordPress platform run by Automattic

Over time, both platforms have evolved to support all kinds of websites, not just blogs. But there are still some crucial differences between them that you need to understand before deciding which one to use.

WordPress hosting

Key Differences at a Glance

Before we dive into the details, here is a quick overview of the main differences:

  • Hosting: WordPress.org is self-hosted, while WordPress.com is fully hosted and managed.
  • Customisation: WordPress.org offers more design, plugin, and functionality options to customise your site.
  • Ownership: You fully own and control a WordPress.org site, while WordPress.com sites are hosted on Automattic servers.
  • Cost: WordPress.com offers free plans, but WordPress.org requires paying for web hosting, which can be cheaper depending on usage and features needed.

Let’s explore each of these differences in more depth…

Comparing Hosting Options

One significant difference is how your WordPress site is hosted:

WordPress.com Hosting

  • Fully hosted and managed by Automattic.
  • Available on a free plan or four paid tiers.
  • Includes hosting, updates, security, backups, SSL certificate, and essential support.

Ideal for Bloggers and businesses who want an easy, hands-off hosting solution.

WordPress Org Self-Hosting

  • You manage your web hosting and install WordPress yourself.
  • Hosting plans start around $5/month from companies like Bluehost or WP Engine.
  • You control updates, security, backups, plugins, themes etc.

Ideal for Developers, designers and companies who want complete control and customisation of the WordPress Dashboard.

So WordPress.com hosts everything for you, while WordPress.org requires finding your hosting. Both have pros and cons depending on your comfort level in website management.

Customisation Capabilities

Another primary consideration is around customising your WordPress site…

WordPress.com Customization

Since it’s a hosted platform, customisations are limited:

  • Choose from 100+ free and premium themes.
  • Some modifications allowed to colours, fonts, etc.
  • No uploading custom themes or plugins.
  • I can’t edit theme files or code.

It is ideal if you only need basic customisation and provided features/designs.

WordPress Org Customization

As an open-source platform, you have endless options to customise your site on WordPress.org:

  • Thousands of free themes with customisable code.
  • Upload any theme or plugin files.
  • Edit files and code directly for deep customisation.
  • Complete control over site functionality and design.

It is ideal if you require advanced customisation and access to extended features.

So, if you just want to choose a nice-looking WordPress theme and don’t need to customise much beyond that, WordPress.com offers an easy option. However, developers and designers who want total control will use WordPress.org.

Comparing Ownership and Control

There is also a difference in who ultimately owns and controls your WordPress site:

WordPress.com Site Ownership

  • Your content belongs to you, but sites live on Automattic servers.
  • Subject to Automattic’s terms of service.
  • If you cancel your plan, you could lose access.
  • Content can be exported, but not theme design or functionality.

This shared hosting environment means less control over your site.

WordPress Org Site Ownership

  • You fully own, host and control your WordPress site and data.
  • You can point your domain anywhere and take your whole website with you.
  • Complete control over the platform running your site.

Self-hosting comes with more power and ownership.

So consider how much control matters for your site goals when choosing between the two platforms.

WordPress hosting

Cost Comparison

Of course, cost is often also an important factor when making any software choice. Here’s how WordPress.com and WordPress.org pricing shakes out…

WordPress.com Costs

  • Free tier but limited features and displays WordPress.com ads.
  • Personal plan: $4/month billed annually.
  • Premium plan: $8/month with eCommerce features.
  • Business plan: $25/month with advanced options.
  • E-commerce plan: $45/month.

These give you managed hosting but can get pricey for premium features.

WordPress.org Costs

  • Free WordPress software.
  • You must pay for web hosting, which starts around $5/month.
  • You may need to pay for security plugins.
  • Potential fees for custom development and design.

It requires paying for your hosting but gives you complete control. If you just want to set up an essential website and don’t need advanced eCommerce or membership features, WordPress.org can work out cheaper in the long run.

So, weigh up what functionality you need vs the convenience of managed hosting through WordPress.com.

Support and Community

Let’s quickly cover how the platforms compare for available support…

WordPress.com Support

  • Knowledge base documentation.
  • Community forums to ask questions from other users.
  • Live chat, email, and phone support are on paid business plans only.

WordPress Org Support

  • Extensive WordPress documentation and tutorials.
  • User forums with a large, helpful community.
  • Many free resources but limited “official” support.
  • Support from web host or pay third-party developers.

WordPress.org relies on its active, expert community for free support, while WordPress.com offers more direct support if you pay.

Which Should You Use?

So which is better – WordPress.com or WordPress.org? Well, there is no “right” option – it depends entirely on your specific needs and priorities for your website.

Here are a few key questions to consider when deciding:

  • How much control do you need over hosting and updates?
  • What level of customisation will be required?
  • Do you need access to a wide range of plugins and themes?
  • Does your budget allow for ongoing hosting/development costs?
  • How experienced are you at managing websites?

For many bloggers and small business owners who just want an accessible, low-maintenance site, WordPress.com does the job beautifully. But for advanced developers, companies managing sensitive data, or users with particular custom needs, WordPress.org provides maximum flexibility and control.

Whether you choose, rest assured that both platforms empower you to build beautiful, robust websites on the trusted open-source WordPress software that powers over 40% of sites on the web.

This overview has helped shed some light on the critical differences between WordPress.com and WordPress.org. Still have questions? Feel free to drop them in the comments section below! I’m happy to help explain anything further about the pros, cons and best use cases for each platform. If you need help with WordPress Web Design, get in touch.

Find Your Perfect WordPress Host: A Complete Selection Guide

perfect wordpress host

G’day folks! Choosing the best WordPress hosting for your website is no easy feat – with so many options, it can get overwhelming. As your trusty WordPress guide here on Meta Trends, let me break things down in this comprehensive hosting guide. We’ll unpack all the nitty-gritty details, from types of hosting to must-have features, so that you can make an informed decision. Let’s dive in!

Understanding Your Hosting Needs

Before anything else – assess your website’s unique requirements. This will determine the kind of hosting plan you need. Here are the key things to think about:

  • Expected traffic – Estimate your daily, monthly and yearly visitors. Is it going to be in the hundreds, thousands or even millions?
  • Type of website – A simple blog has different needs than an online store. Identify whether yours will be informational, e-commerce, portfolio, etc.
  • Scalability – How quickly will you grow? Your hosting should seamlessly scale with your evolving bandwidth and storage needs.

You gain clarity on the right hosting type and features by mapping these out.

Types of WordPress Hosting

Now, let’s explore the various WordPress hosting options:

Shared Hosting

This is the most budget-friendly hosting where multiple websites share server resources. Ideal for:

  • New websites
  • Low-traffic sites (<10k visitors/month)
  • Basic WordPress needs

However, performance can be inconsistent with high traffic spikes on a shared server.

Types of WordPress Hosting

VPS (Virtual Private Server)

A VPS partitions resources from a single physical server to allocate a fixed amount exclusively for your site. Ideal for:

  • Medium traffic websites (10k to 100k visitors/month)
  • Sites needing more control and customisation

It strikes a balance between performance and affordability.

Dedicated Hosting

Your site only gets an entire server for maximum power and resources. Ideal for:

  • High traffic websites (>100k visitors/month)
  • Data sensitive applications
  • Mission-critical sites

It’s the most customisable, albeit pricier, option.

Managed WordPress Hosting

Your hosting provider handles server admin, updates, backups, caching and security so that you can focus on your site. Ideal for:

  • Anyone who doesn’t want to deal with technical hosting tasks
  • Areas with dynamic needs and growth

It takes WordPress hosting to the next level for a smooth user experience.

Key Hosting Features

Along with the right hosting type for your WordPress site, keep an eye out for these key features:

Uptime – Look for at least 99.9% uptime, ensuring your site is consistently available.

Page Speed – Your host should have speed-enhancing technologies like SSD storage, caching and CDNs.

Support – Choose a provider with round-the-clock customer support for any hiccups.

Backups & Security – Must-haves for protecting your site against malicious attacks, data loss, etc.

Scalability – Go for flexible hosting plans that can seamlessly scale with your growth.

Money-back guarantee – A good host will offer this, so you can exit hassle-free if you’re unhappy.

Evaluating Hosting Providers

With hosting types and must-have features checked out, let’s explore top WordPress host contenders…

Top WordPress Hosts

SiteGround – Known for superb speeds with an integrated CDN and excellent customer support with solutions, just a chat or call away.

Bluehost is a trusted legacy player with solid security, backups, and low introductory prices.

WP Engine – The premium managed WordPress hosting focused on speed, security, and support.

DreamHost – Packs excellent bang for your buck with 1-click WordPress installs and a free domain forever.

HostGator – Generous 45-day money-back guarantee with excellent uptime and performance.

InMotion – Fast hosting with the latest tech and tools for smooth WordPress management.

Those are fantastic starting points – now, let’s move on to two other evaluation criteria…

Evaluating Hosting Providers

Community Reviews

It’s wise to check out actual user reviews before committing to a host. Look beyond the marketing spiel and paid reviews. Identify popular impartial sources like TrustPilot and opinionated blogs like WPBeginner to guide your verdict.

Hosting Plans

Compare monthly, annual or more extended subscription plans across shortlisted hosts. Apart from length and pricing, here are crucial considerations:

  • Disk space and bandwidth allotments
  • Number of email accounts and databases allowed
  • SSL certificate inclusion
  • IP addresses – shared or dedicated
  • Domain allowances – free or paid

Also, watch out for renewal price hikes or hidden fees down the road.

Optimising Technical Factors

Beyond shopping for the basics, optimising these technical nuances pays off in spades with faster, resilient WordPress performance:

Server Location

Locating your server nearer to your audience is critical for reducing lag and boosting site speed. Identify hosts with infrastructure close to your traffic hotspots.

CDNs

Content Delivery Networks (CDNs) have distributed caching servers worldwide to minimise delays in content delivery across regions. Using a CDN service further accelerates static file loading like images, CSS and JS – improving site performance and conversion rates.

PHP Version

WordPress requires PHP to function. Go for hosts running the latest PHP 8+ for better coding standards, debugging and significant speed gains over outdated PHP 5.x versions.

MySQL Database

Managed database systems like MySQL handle data storage and retrieval. Ensure your host provides open-source MySQL instead of premium proprietary databases to avoid vendor lock-ins or complex migrations if you switch hosts later.

Free SSL Certificate

An SSL (Secure Sockets Layer) certificate establishes an encrypted link between your website and visitors’ browsers. Apart from enabling HTTPS for better search engine rankings – it securely transmits sensitive user data like login credentials and payment info. As SSL adoption grows, ensure your host includes one for FREE with your plan.

Managed WordPress Hosting – Is It Worth It?

Now for specialty managed WordPress hosting… Is it worth the higher price tag? Let’s analyse the pros and cons:

Advantages

  • Automatic site updates
  • Expert WordPress support
  • Enhanced security protections
  • Stress-free maintenance
  • Smoother future scaling

Disadvantages

  • More expensive than regular hosting
  • Potential theme and plugin restrictions

Verdict – Managed WordPress hosting merits the premium for mission-critical sites where air-tight performance and security are non-negotiable. Regular hosting plans can suffice for smaller areas on a budget if you’re comfortable being your admin.

Making Your Final Decision

After weighing your options – here’s my handy checklist before locking in a WordPress host:

Hosting Checklist

  • Identify website needs
  • Map out traffic projections
  • Choose the ideal hosting type
  • Compare provider plans pricing
  • Check community reviews
  • Analyse core features like speed, uptime, etc
  • Assess value-adds like free site migration
  • Confirm technical optimisations

Common Pitfalls

Steer clear of these all-too-common hosting mistakes:

  • Opting for the cheapest solution
  • Overlooking scaling capabilities
  • Not checking renewal rate hikes
  • Ignoring location and hardware redundancy

Migrating Hosts Smoothly

Moving WordPress sites across hosts is NOT fun – but doable:

  • Backup your site through your current WordPress dashboard
  • Install migration plugins like Duplicator
  • Test your site on the new host once the transfer is completed
  • Update your domain’s nameservers
  • 301 redirects old URLs to new ones

For more complex site migrations, it may be best to hire an expert developer.

And voila – you’re now prepped to grab the perfect WordPress home that’ll stand the test of time as your online venture flourishes!

Key Takeaways

  • Audit your WordPress site’s requirements and growth roadmap
  • Choose managed, VPS or shared hosting tailored to current and future needs
  • Scrutinise host uptime, support levels and security measures
  • Optimising location, CDNs and software stacks pays dividends
  • Budget pricier managed hosting for mission-critical sites
  • Avoid common pitfalls like ignoring scalability or renewal fine print

FAQs

Do you have lingering questions about WordPress hosting? Here, I tackle some popular head-scratchers:

Q: What is the difference between WordPress.org and WordPress.com?

WordPress.org lets you self-host WordPress on your domain with total flexibility and control. Whereas WordPress.com offers more limited managed plans with WordPress.com subdomains.

Q: How do I access my WordPress dashboard

To access your self-hosted WordPress site’s backend dashboard – visit yourdomain.com/wp-admin and log in with your credentials.

Q: How much should I budget for WordPress hosting?

Shared hosting plans start around $2.75/month, whereas managed WordPress plans cost $15-$50+/month. Calculate at least two years’ worth to bag the best rates on longer commitments.

Q: Can I use a free WordPress hosting plan?

I advise against free WordPress hosting services. These offer limited resources, leading to subpar uptime and response. Opt for an affordable paid plan for respectable performance.

Q: Is WordPress hosting different from web hosting?

Yes, WordPress hosting is fine-tuned for optimal support of WordPress sites. General web hosts may lack crucial WP-specific optimisations.

I hope this jam-packed guide was the perfect starting point for choosing a home sweet home for your precious WordPress baby! Have we got any other questions? Fire away in the comments!

Top 10 Must-Dos After Installing WordPress

What to do after installing wordpress

Good Morning All! Alex here from Meta Trends, providing the latest web development tips, tricks, and insights to take your online presence to the next level.

So you’ve taken the first crucial step towards building a fantastic website – installing WordPress! As one of the most popular content management systems out there, WordPress offers endless possibilities for crafting an engaging online experience.

But the journey doesn’t stop after installation. There are some vital steps to take in those initial days after setup that will save you headaches down the road as your site grows. From security measures to performance optimisations – I’ve compiled my top 10 essential things you should do after installing WordPress. These tips will set you firmly on the path to WordPress success!

1. Choose Reliable WordPress Hosting

The foundation of any thriving WordPress site is reliable hosting. When choosing WordPress hosting, opt for a provider explicitly optimised for WordPress. General shared hosts typically don’t offer the infrastructure and support needed to manage a WordPress site as it scales.

Instead, look for hosts like WP Engine or Kinsta that offer essential WordPress-specific features like staging environments, automated updates, and WP-CLI integration. This ensures your site stays secure, performs well, and allows you to add functionality confidently without fear of crashes.

If going the managed WordPress host route seems expensive, check if the provider offers a free migration service from your current host. The performance and reliability gains are worth the investment in the long run.

Enabling HTTPS for your shiny new WordPress site

2. Set Up HTTPS

Enabling HTTPS for your shiny new WordPress site should be one of the very first things on your to-do list. Browsers are increasingly flagging HTTP sites as “not secure, ” which can negatively impact visitor trust and engagement.

Switching to HTTPS encrypts the data between servers and browsers, providing a critical layer of security. Most managed WordPress hosts like WP Engine make this process hassle-free with auto-enabled, free SSL certificates.

If your current host doesn’t offer this, install a free SSL plugin like Really Simple SSL to get you started until you migrate to a fully managed host. Prioritise this switch as soon as possible – HTTPS is non-negotiable these days!

3. Update Login Credentials

I hate to say it, but the default WordPress admin credentials act like a welcome mat for attackers spoiling to wreak havoc on your site.

As soon as you install WordPress, one of the first things you should do is update those admin login details. Don’t worry, it only takes a minute!

First, manually create a new admin WordPress user via the dashboard. Next, delete the default admin account altogether. Not only does this add security through obscurity, but it also makes automated bot attacks attempting the default admin login futile.

To take it further, install a plugin like iThemes Security or Wordfence for advanced user authentication and login protection. Get those login credentials locked down ASAP!

4. Install Essential Plugins

The real magic of WordPress comes with plugins – those nifty extensions that add all kinds of functionality to your site. While resist plugging in every shiny plugin you see, there are a handful considered essential:

1. Security plugins like WordFence or Sucuri act as the guardians at your site’s gate, protecting you from intrusions.

2. SEO plugins like Yoast SEO optimise your content for search engines while also simplifying the process of crafting SEO-friendly content in the first place.

3. Backup plugins like UpdraftPlus provide peace of mind by securely backing up your valuable site data daily or weekly. When (not if) disaster strikes, you’ll be glad you had a backup in place.

4. Caching plugins like WP Rocket or W3 Total Cache dramatically improve site performance by reducing server requests and load times. Slow sites are sites where visitors won’t stick around – optimisation is vital!

Some plugins handle everything from contact forms to analytics to migrations and more. But every site should have these four pillars installed to start. You can build from there!

5. Pick a Trusted Web Host

We briefly touched on this before, but choosing a reliable, high-quality WordPress hosting provider deserves emphasis. Your host significantly impacts everything from site speed and security to uptime and support response times.

Rather than stuffing your site onto an overcrowded, underpowered shared server, pick a host like WP Engine or Kinsta, explicitly built for WordPress. Your future self battling a sluggish or hacked site will thank you!

WordPress.com vs WordPress.org – what’s the difference? WordPress.com offers limited free hosting for blogs, while WordPress.org is the open-source CMS downloaded from WordPress.org that gives you total control…and responsibility. Using managed WordPress hosting like WP Engine means you get the freedom of self-hosted WordPress with hosting optimised for scale and security.

Set Up Google Analytics

6. Set Up Google Analytics

Understanding exactly how people discover and interact with your website provides priceless insight for growth. That’s where Google Analytics comes in.

The powerful yet free analytics tool integrates seamlessly with WordPress, giving you the ability to:

  • Track visitors and traffic sources
  • Identify visitor behaviour and engagement metrics
  • Establish goals and conversion funnels
  • Gather data for optimising pages and content
  • Monitor campaigns and UTM parameters
  • And much more!

For a comprehensive overview, check out Google’s guide on setting up Google Analytics with WordPress. Get those tracking codes added pronto – the data will prove invaluable.

7. Optimize Images

Here’s a little-known fact about WordPress sites: Over 60% of a web page’s content comes from images. Yet oversized, unoptimised images can slow down even the fastest areas.

Optimising your images should be a top priority after installing WordPress. Thankfully, some phenomenal plugins handle this automatically:

EWWW Image Optimizer compresses images on the fly as you upload them, resizing and converting formats when savings are available.

ShortPixel can optimise your entire media library in bulk with intelligent lossy and lossless compression for PNG, JPG, and PDF files.

And for the CDN piece of the puzzle, WP Offload Media sends images to blazing-fast content delivery networks like Cloudflare and BunnyCDN for free.

With these three plugins, your image optimisation process is set-and-forget. Welcome fast site speeds and happy visitors!

8. Make It Mobile-Friendly

Here’s an alarming stat: Over 60% of online traffic now comes from mobile devices. And that percentage grows every year. Yet many websites still aren’t mobile-friendly, which equals lost opportunities.

Thankfully, WordPress makes creating a stellar mobile experience easy. Just be sure that:

  • Your theme is responsive and out-of-the-box for adapting across device sizes.
  • Keep page sizes lean by optimising images, limiting plugins, and implementing caching.
  • Content is easily read on smaller screens with brief paragraphs, large text, and concise wording.
  • CTAs and tabs target fingers via tap expansion techniques.
  • Page speed remains fast courtesy of site caching and a CDN.

Also, test the front end using Google’s Mobile-Friendly Test. Don’t lose 60%+ of potential traffic simply because your site didn’t play well with mobile!

Mobile Friendly Website

9. Make Updates a Habit

One crucial lesson I’ve learned building WordPress sites all these years: Always keep your plugins, themes, and WordPress core updated.

Updates don’t just fix bugs and patch security issues. They also add new functionality and give access to speed and tech improvements under the hood you’ll miss out on otherwise.

Managing updates is practically on autopilot these days for self-hosted WordPress sites. Most managed hosts like WP Engine handle core updates automatically in the background. Plugins and themes typically update themselves as well.

However, I still recommend manually checking your Updates screen every week or two to stay informed. Think of updates as less annoying and more as a gift, bringing fresh features and protections with every release!

10. Establish an Editorial Calendar

When starting any website or blog, it’s easy to become overwhelmed thinking about generating endless ideas and content. An intelligent way to tame the beast? Creating an editorial calendar.

An editorial calendar outlines specific topics and themes you intend to cover weekly or monthly. This serves several purposes:

  • It focuses your content brainstorming into organised buckets, so you’re not grasping at straws for ideas.
  • You can plan content that aligns with annual events, holidays, or seasons.
  • Mix evergreen and trending themes to appeal to both new and returning visitors.
  • Identify content gaps that need your attention.
  • Coordinate guest contributors and content assignments.

A simple Excel, Google Sheets, or Airtable document breaking down posts by week or month works wonders. Tools like CoSchedule take things even further with drag-and-drop functionality, collaborator options, and integrated analytics.

Thoughtful planning yields thoughtful content. An editorial calendar gets those creative juices flowing on autopilot!

Let Your WordPress Journey Begin!

There you have it – my top 10 tips for setting up a successful WordPress website ready for the long haul after a fresh installation!

From fine-tuning the fundamentals like hosting, plugins, and security to crafting mobile-friendly experiences to getting savvy about site analytics – prioritising these steps early in your WordPress life cycle will pay dividends as your site grows.

Now that you’re armed with a battle plan for WordPress success, the only thing left is taking action! Start checking off the items outlined above and watch your website thrive. Feel free to email me in the comments with any questions along the way – I’m happy to help however I can!

Here’s to launching an excellent WordPress site made to stand the test of time. Now get out there, have fun, and start delighting your audience!

Master WordPress Easily: The Ultimate Beginner’s Guide

WordPress beginners guide

G’day folks! Alex here, your friendly neighborhood WordPress wizard. If you’ve landed on this post, you’re likely new to WordPress and looking for guidance on getting started. Well, you’ve come to the right place!

In this beginner’s guide, we’ll cover all the WordPress basics – from understanding what WordPress is, choosing hosting, installing WordPress, selecting a theme, plugins, customization, and more. I’ll be with you every step of the way with my trusted expertise. So, let’s get cracking!

What is WordPress?

WordPress is an open-source content management system (CMS) that powers over 30% of all websites on the internet. It started as just a simple blogging platform but has evolved into a full-fledged CMS over the years.

Here are some key things you should know about WordPress:

  • Free to use open-source software
  • Used by bloggers, businesses, and enterprises
  • Powers websites through its themes and plugins
  • Highly flexible and customizable
  • It has a strong community and ecosystem

WordPress provides all the tools you need to build professional websites without coding everything from scratch. Its wide adoption, ease of use, flexibility, and robust features make WordPress a favourite for site owners of all scales and verticals.

Choosing WordPress Hosting

Before installing WordPress, you need a hosting provider to host the WordPress files and database. When choosing one, here are the key factors to consider:

  • Speed and performance: You want a provider with fast servers and robust infrastructure to ensure maximum uptime and performance.
  • WordPress optimization: Choose a provider optimized for WordPress with features like 1-click installs, pre-configured caching and security, and auto updates.
  • Reliability and support: Pick a reputable provider with 24/7 customer support if anything goes wrong.
  • Scalability: As your site grows, the hosting should be able to scale with your needs seamlessly.

Some top-rated managed WordPress hosts include Rocket.netKinsta, and WP Engine. I recommend SiteGround for most beginners as they provide a great blend of performance, features, and affordability.

How to Install WordPress

Once you have secured hosting, installing WordPress is an absolute breeze. Here is a simple step-by-step guide:

  1. Log in to your web hosting account and access the WordPress installation section.
  2. Enter your site details like domain name, title, admin credentials, etc.
  3. The installer will then automatically create the database, configure files, and install WordPress. That’s it!

The exact installation steps can vary slightly across different hosts, but they provide simple 1-click installers that handle all the heavy lifting.

If your host does not offer a 1-click installer, you can manually install WordPress by uploading the WordPress files via FTP and configuring the database. However, the manual route does require some technical skills.

What to Do After Installing WordPress

After you have installed WordPress, what do you do? I recommend new users follow this checklist:

  • Log in to the admin dashboard: Check that you can access the /wp-admin login page and log in using the credentials created during the installation.
  • Change/Reset your password: Update the admin password from the default to a stronger and more secure one.
  • Update WordPress Core files: You always want to be on the latest version for security and feature updates.
  • Install essential plugins: Start by installing crucial plugins like a security plugin, SEO plugin, and caching plugin.
  • Pick a theme: The default theme might not be ideal for your website, so install a new piece that aligns with your brand identity.
  • Configure site settings: Update key settings like your site title, tagline, timezone, date and time formats as needed.
  • Set up navigation menus: Menus allow users to navigate between sections of your site easily.
  • Create your first post: Make a quick post to ensure content creation works smoothly.

This might seem like many steps, but I’ll break things down piece by piece over the rest of this beginner’s guide to help you understand core concepts.

Getting Familiar with the WordPress Dashboard

The WordPress dashboard is the central hub that gives you access to everything needed to build, manage and control your site. It greets you right after you log in with the /wp-admin URL.

Some key things you can do via the dashboard:

  • Manage all site content (posts, pages, media etc.)
  • Install and customize themes/design.
  • Extend functionality with plugins.
  • Configure settings
  • Moderate discussions
  • Create and manage menus
  • View site stats and analytics

It might look overwhelming initially, but as you spend more time and get familiarized, things fall into place. Don’t hesitate to poke around a bit!

Now, let’s get into the meaty stuff.

Working with WordPress Posts and Pages

WordPress uses two key content types – Posts and Pages. Understanding the difference between the two is crucial.

Posts are blog-style articles with publishing dates, categories and tags. They appear on blog listings, RSS feeds, archives, etc.

Pages are static standalone web pages like About, Services, Contact, etc. They are not categorized and only appear in specific menu links.

You can access the post and pages section from the left sidebar menu to start creating content. The integrated post editor makes creating and formatting content without technical skills easy.

Choosing and Installing WordPress Themes

Themes control how your overall site looks, feels and functions. WordPress themes allow you to customize colours, fonts, layouts, graphics and additional features through a few clicks.

You can browse and install themes with the click of a button via the Appearance > Themes screen. Activate the music you like to make it live.

I recommend installing a premium theme for the most flexibility in design customization. Some popular premium theme marketplaces include ThemeForest, Elegant Themes and MyThemeShop.

Pro Tip: Always back up your existing theme before changing to a new one!

Customizing Your Site with Plugins

Plugins extend WordPress functionality beyond the core features. They allow you to add advanced features like contact forms, e-commerce, security, and more to your site.

To add a new plugin, browse or search the library of 55,000+ free plugins available from your dashboard via Plugins > Add New. Then click install and activate any plugin you need.

Some must-have plugins I recommend are:

  • Yoast SEO – For optimizing content for search engines
  • WP Rocket – To speed up site performance
  • Sucuri Security – For protection against malware and attacks
  • Google Analytics – For tracking detailed site analytics

Do some research to find plugins that fit your specific site needs. But also don’t overdo it! Too many plugins can slow your site down.

Using the WordPress Customizer

The WordPress Customizer allows you to preview and customize many aspects of your site in real time without needing to install anything.

Access it via Appearance > Customize on your dashboard menu.

You can tweak things like:

  • Site identity like title, tagline and logo
  • Colours, backgrounds, fonts, etc.
  • Menus and widgets placement/settings
  • Theme settings and options

The customizer eliminates the need to manually code changes or edit PHP files, allowing rapid customization using a live preview.

It might take some initial trial and error, but mastering the customizer can help customize your site design without touching any code.

Optimizing WordPress SEO

Optimizing your WordPress site for search engines allows more people to discover your content across Google and other search engines.

Some essential SEO tips for beginners include:

  • Pick a brandable domain name with target keywords
  • Structure URLs with keywords
  • Install a SEO plugin like Yoast SEO
  • Optimize page titles and meta descriptions
  • Create sitemaps for indexing
  • Produce search-friendly content
  • Grow quality backlinks

Search engines are complex algorithms, but getting SEO fundamentals right ensures you gain traction and conversion-focused traffic.

Finding Help As a WordPress Beginner

I hope this beginner’s guide gives you a solid grounding in understanding core WordPress concepts. But I’m sure there will still be questions, so here are helpful places to find WordPress support as a beginner:

  • Official WordPress Support Forums – Active community that helps diagnose issues
  • WPBeginner – Detailed WordPress tutorials and how-tos
  • YouTube tutorials – Video lessons are a great visual resource
  • Hire a WordPress Expert – If stuck in a rut, some personalized assistance can be invaluable

And of course, you can always hit me up via the comments section or social channels, and I’ll help however I can!

Right, that just about wraps things up. We’ve covered some ground, laying out WordPress basics tailored to help you kickstart your site correctly. Time to put it into practice!

Let me know how setting up your first WordPress site goes or if you have any other questions. I might whip up some more beginner-friendly guides if there is interest.

If you need help with a WordPress business website, we are here to help.

WordPress Setup Simplified: Your First-Time Installation Guide

How to Install and Set Up WordPress for the First Time

Good Morning, folks! 👋 It’s your friend Alex here from Meta Trends. I’m stoked to write this handy guide on installing and setting up WordPress for the first time. The whole process can seem overwhelming, especially when you’re just starting, so I wanted to break it down step-by-step to make it as easy as a walk on the Beach. 🏖️

Before You Get Your Feet Wet: Understanding WordPress

Before installing WordPress, it’s essential to understand what WordPress is and how it works.

  • WordPress is an open-source content management system (CMS) used to build websites and blogs. It powers over 41% of all websites! 🤯
  • There are two main ways you can use WordPress:
    1. WordPress.com: This is the fully hosted version where they handle all the hosting and technical stuff for you. It’s the easier option, but you have less control.
    2. WordPress.org: This is the self-hosted version where you manage your hosting. You download the WordPress software and install it yourself on your web host. It requires more effort upfront but near endless customization possibilities!
  • Throughout this beginner’s guide, I’ll focus on WordPress.org since that gives you more flexibility and control over your site.

Choosing Your WordPress Hosting

You’ll need to sign up for web hosting since you’ll handle the hosting duties with WordPress.org. Your hosting provider can make or break your site, so this decision is crucial!

Here are a few things to look out for when selecting WordPress hosting:

  • Speed: You want a host that offers fast server speeds so your site loads snappily for your visitors. Slow sites lead to high bounce rates, affecting conversions and search engine rankings. No bueno! Look for hosts with SSD storage, CDNs, caching, or other optimizations.
  • Uptime: Your host should guarantee at least 99.9% uptime so your site is always online for your peeps. Anything less is not cool, man.
  • Support: A good WordPress host will have 24/7 support via live chat, email, knowledge bases, and forums. You never know when you might get stuck setting something up, so quality support is critical for getting unstuck.
  • Managed WordPress Hosting: Some hosts like Rocket.net and Kinsta specialize in optimized WordPress hosting. This can simplify managing your WordPress site since they handle updates, speed optimizations, security, and more out of the box!

Based on these criteria, I recommend checking out Rocket.netBluehost, or Kinsta hosts. Make sure to size your account based on expected site traffic, too.

Wordpress dashboard

Registering Your Domain

In addition to hosting, you’ll also need to register a domain name for your spanking new WP site!

Your domain is your website’s address (like metatrends.com).

Here are my top tips for picking the perfect domain:

  • Brand relevance – Choose a name related to your biz or blog so peeps intuitively know what you’re about
  • Extensions – Most folks go with .com, but other options exist, like .net, .blog, etc.
  • Easy to spell & remember – Avoid complicated names or weird spellings – keep it simple!
  • Short – Short domains (under 15 characters or so) are most accessible for sharing and typing out.

Once you’ve picked your perfect domain, it’s time actually to register it. You can register domains through hosts like Bluehost or with a dedicated domain registrar like Namecheap or GoDaddy.

It only takes a few minutes to lock down your custom domain once you settle on the right name!

Preparing Your Website Files

Now for the fun part – getting WordPress installed and up and running! 🥳

First, you’ll want to download the latest version of the WordPress software from the official WordPress site. They have an easily automated installer to fetch all the needed files.

Once the files finish downloading, use an FTP client like FileZilla to upload those WordPress files directly to your hosting account’s public directory. If you run into issues with FTP, many beginner-friendly hosts also have file managers or installation tools within their control panel dashboards.

In my other post, I discuss the file upload process more deeply. But for now, let’s move on to the actual WP installation!

Installing Your WordPress Site

At last, it’s time for the actual WordPress installation. Buckle up; here we go!

You have two options: the famous one-click install method or going full DIY with the manual install method.

Setting up WordPress

One-Click Install Method

Super straightforward – most managed WordPress hosts like Kinsta or SiteGround have handy auto-installers built into their control panels.

Usually, you enter your site name, admin credentials, database details and boom! – WordPress gets set up hands-free in just a few minutes without ever leaving your dashboard. Pretty gnarly, eh!

So if your WP host offers the one-click install, I say hang ten and go for it, dude! Installing WordPress doesn’t get much more accessible.

Manual Install Method

If your host doesn’t have the one-click installer, no worries! You can still manually install WordPress; it just takes a few extra minutes.

Here is an overview of the manual install steps:

  • First, you must create a new database within your hosting account to store all your website data. You can easily add databases from your hosting control panel.
  • Next, launch the WordPress installation process by navigating to yourdomain.com/wp-admin/install.php in your browser.
  • On the first screen, enter your database credentials, so WordPress knows where to set up shop!
  • Finally, provide details about your first admin user, site title and email address to complete the installation.

And just like that, you’ll have a fully functioning WordPress site ready to roll! High fives all around! 🙌

What to Do After Installing WordPress

Congratulations – now you have a live WordPress site primed for action! Pat yourself on the back.

Here are the first few things I recommend tackling right after installing WordPress:

🔑 Enhance security – Install essential plugins like Wordfence or iThemes to protect your site from baddies. Enable automatic updates, too, so you get the latest security patches. Safety first!

🛠️ Install must-have plugins – Spruce up your site’s functionality with plugins! Some top picks are Yoast SEO, contact form, social sharing, backups, caching and more.

🌅 Pick a theme – Change the appearance and aesthetics of your site by installing a WordPress theme. There are many great free or paid options – find one that suits your vibe!

📝 Create your first post – Time to put that WP content engine to work! Add a new post in your admin dashboard to see the WordPress post editor in action.

That covers the key next steps to polish up your site. But don’t stop there – half the fun with WordPress is continually finding new ways to customize your site and enhance the user experience! 😎

Ride those waves, amigos! Let me know in the comments if you have any questions about your first WordPress install!

If you need help with WordPress, please visit our WordPress services.